Before you begin, make sure you have a stable internet connection - this is critical for a successful installation.
Go to Settings:
Tap Connections.
Go to SIM manager.
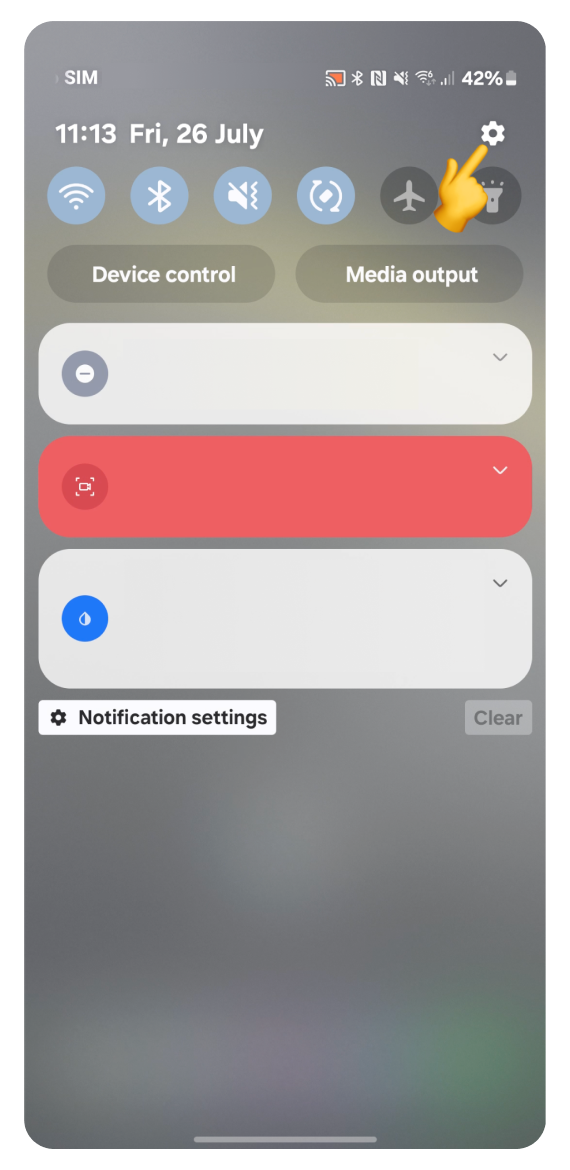
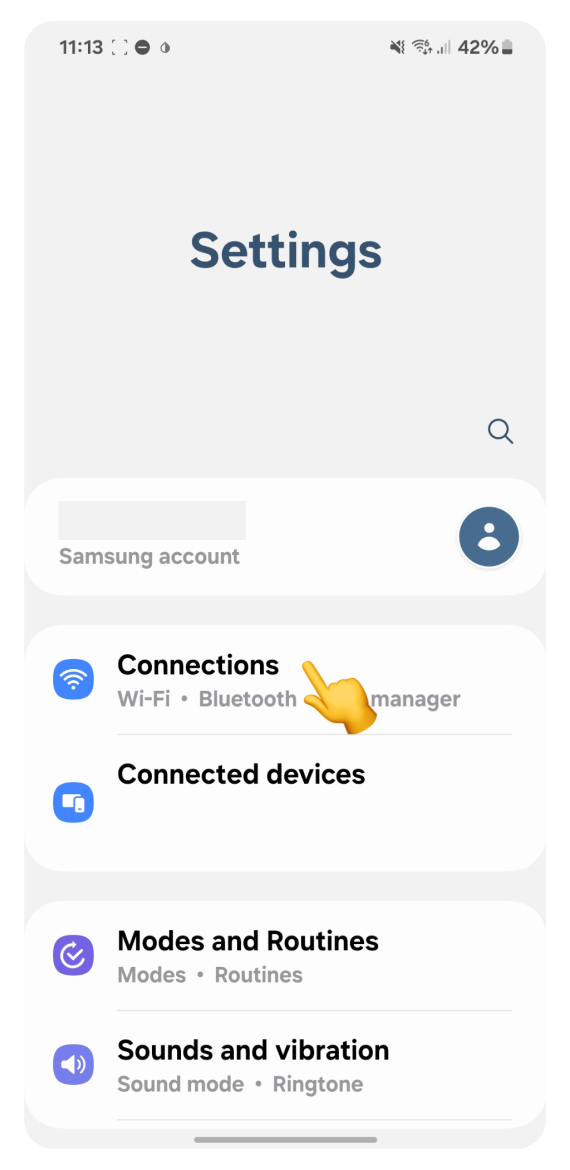
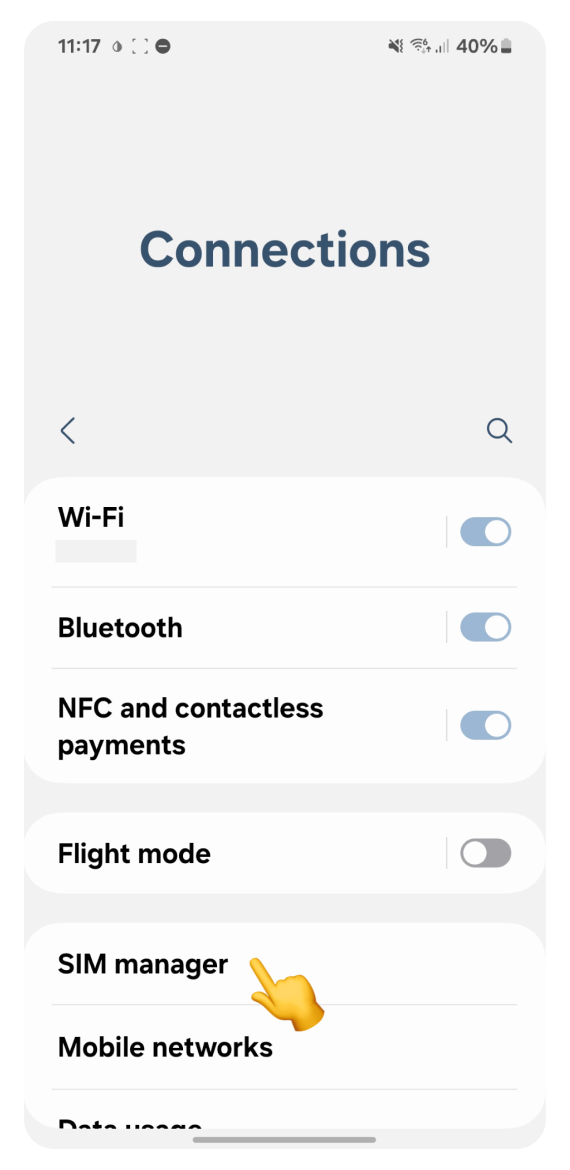
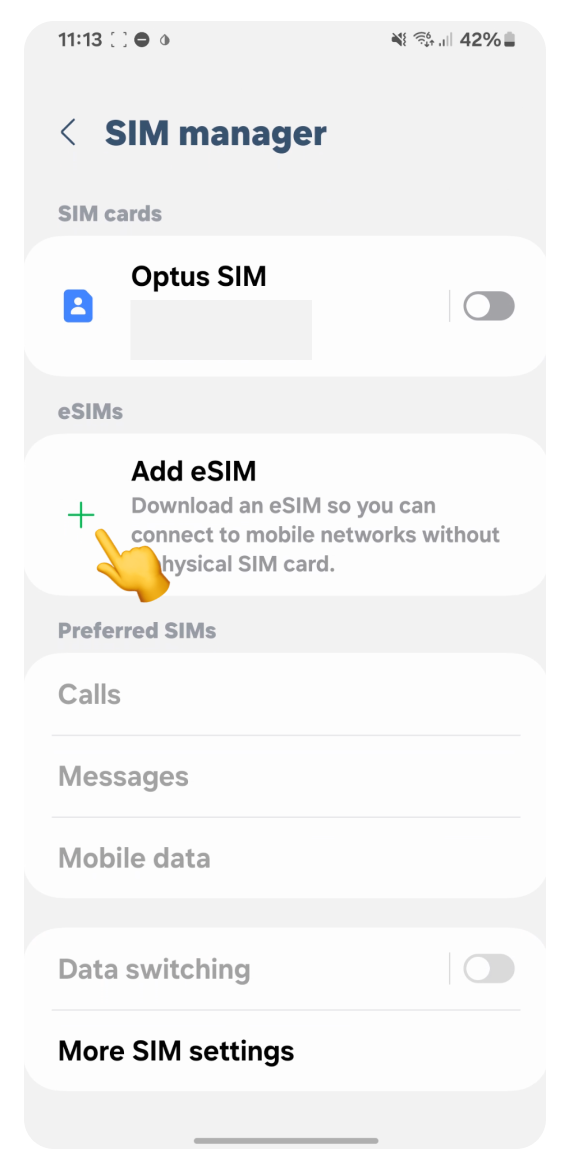
Tap + Add eSIM.
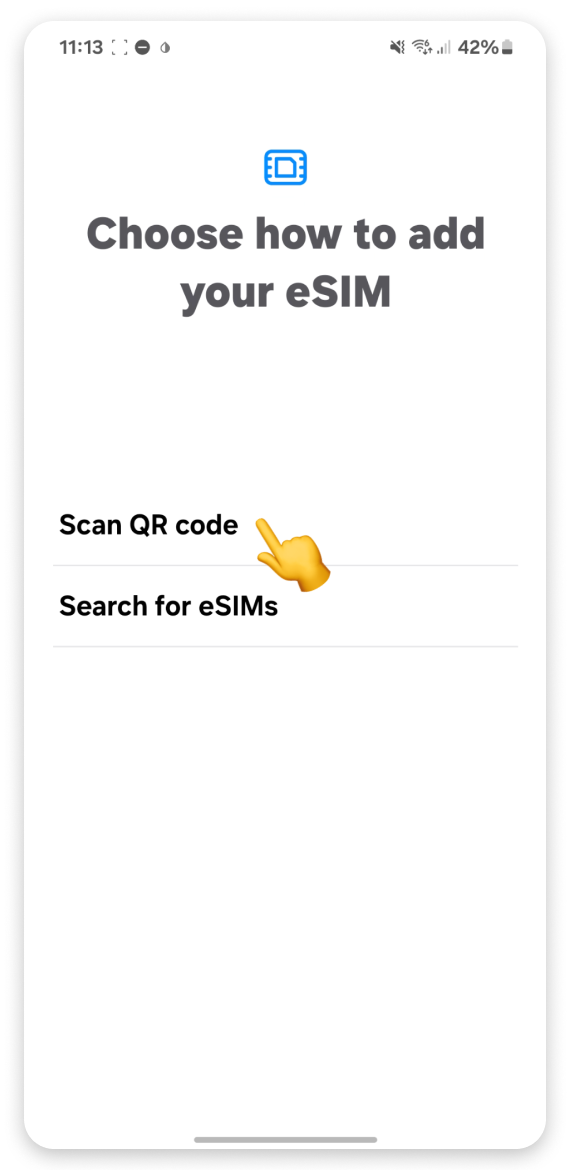
Tap Scan QR code.
Log in to the account you used to purchase your travel eSIM:
Go to Your Account.
Click Complete eSIM setup on your eSIM view.
Click the “No app” tab in the pop-up.
Scan the QR code.
If you can’t log in to your account:
Open the purchase confirmation email sent right after you bought the eSIM.
Scroll to find the QR code and scan it.
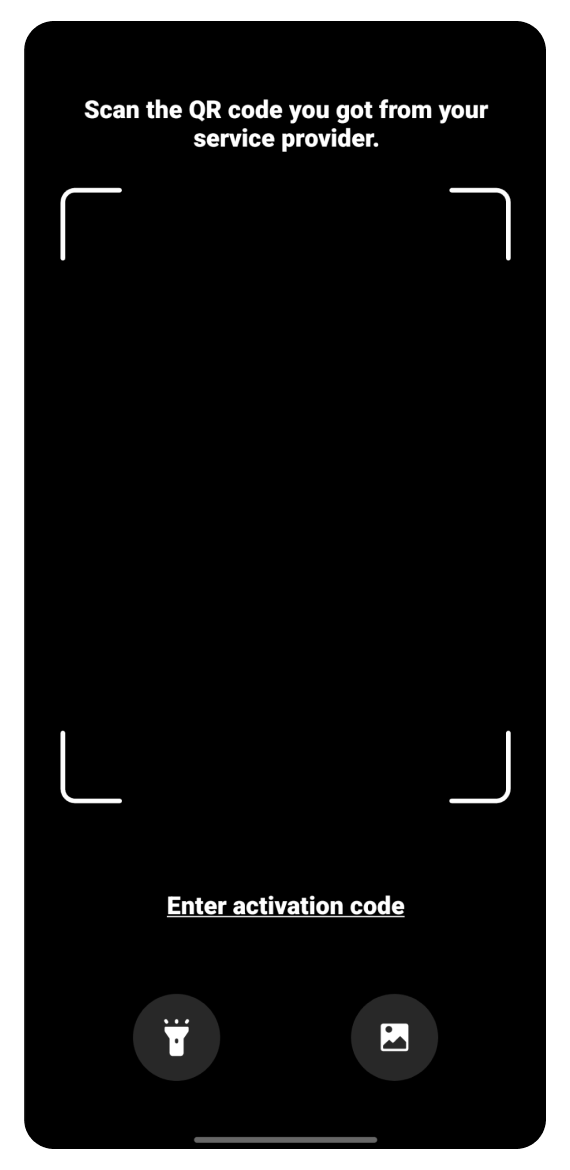
If you can't scan the code:
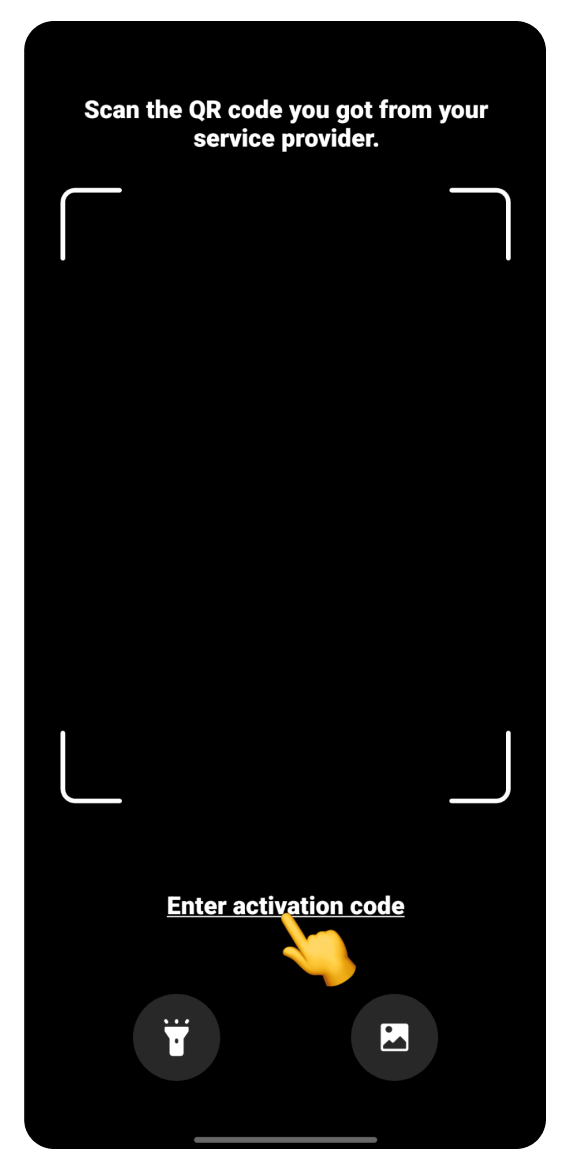
Tap Enter Activation Code.
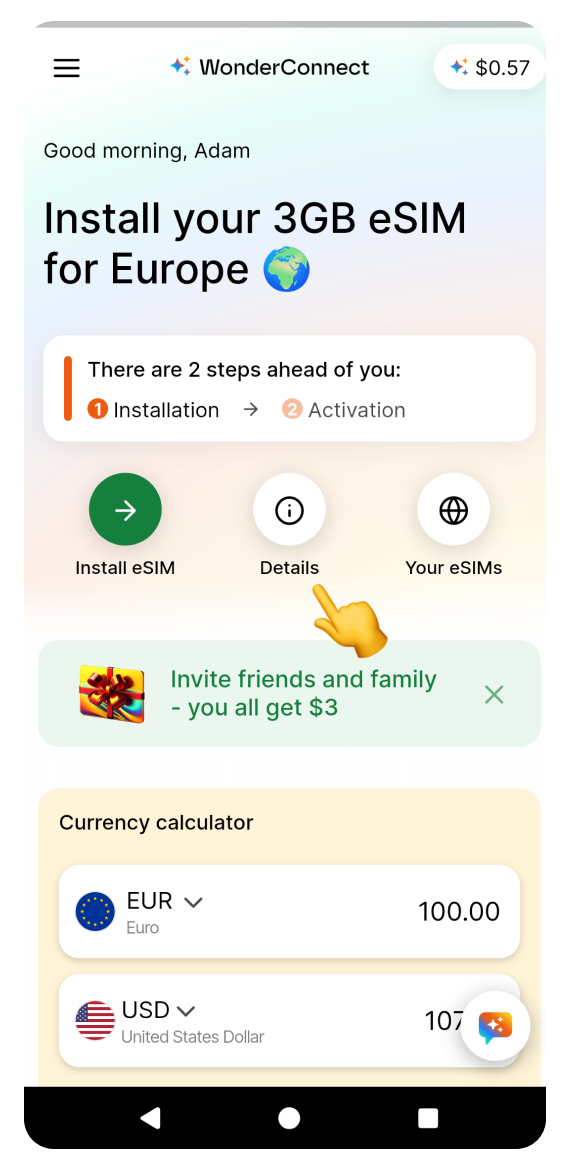
Open the WonderConnect mobile app:
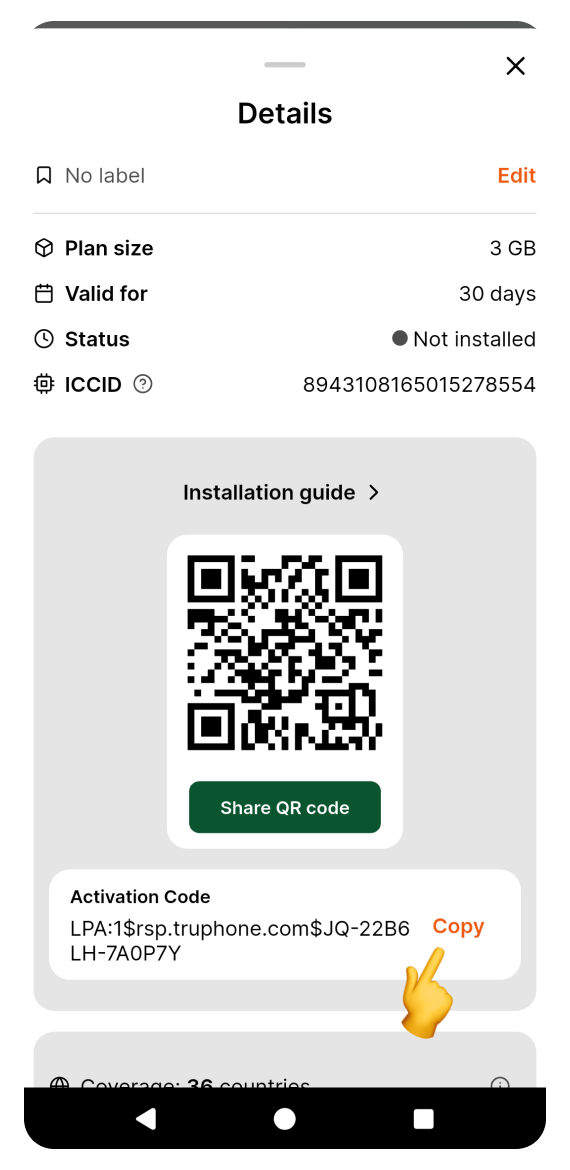
Tap Details on the home screen.
Copy the Activation Code.
 Open the purchase confirmation email sent right after you bought the eSIM. Copy the activation code from the email.
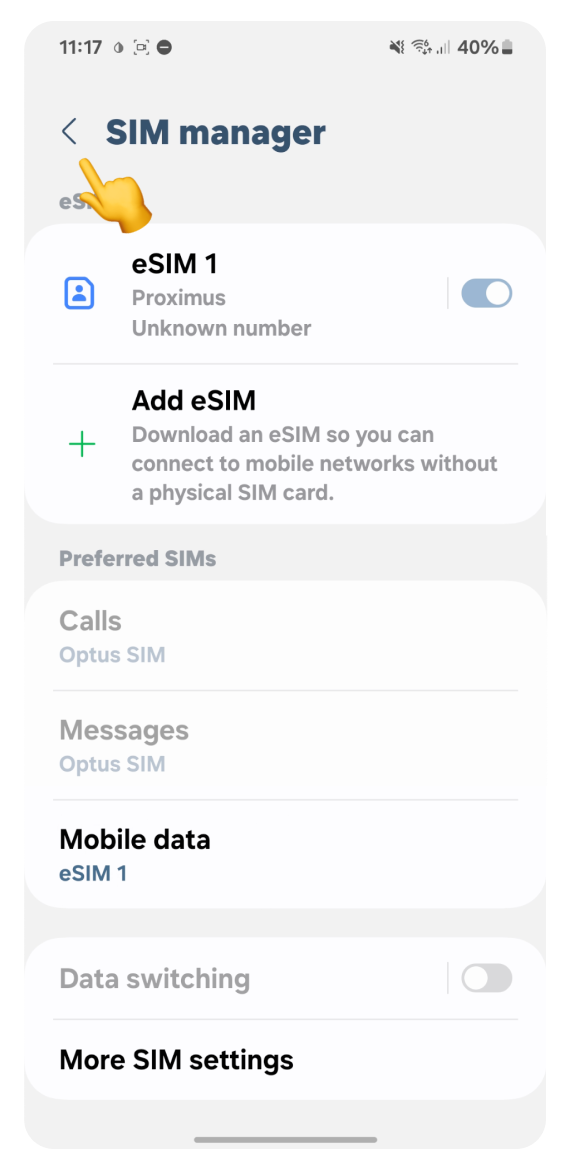
Go back to the settings screen:
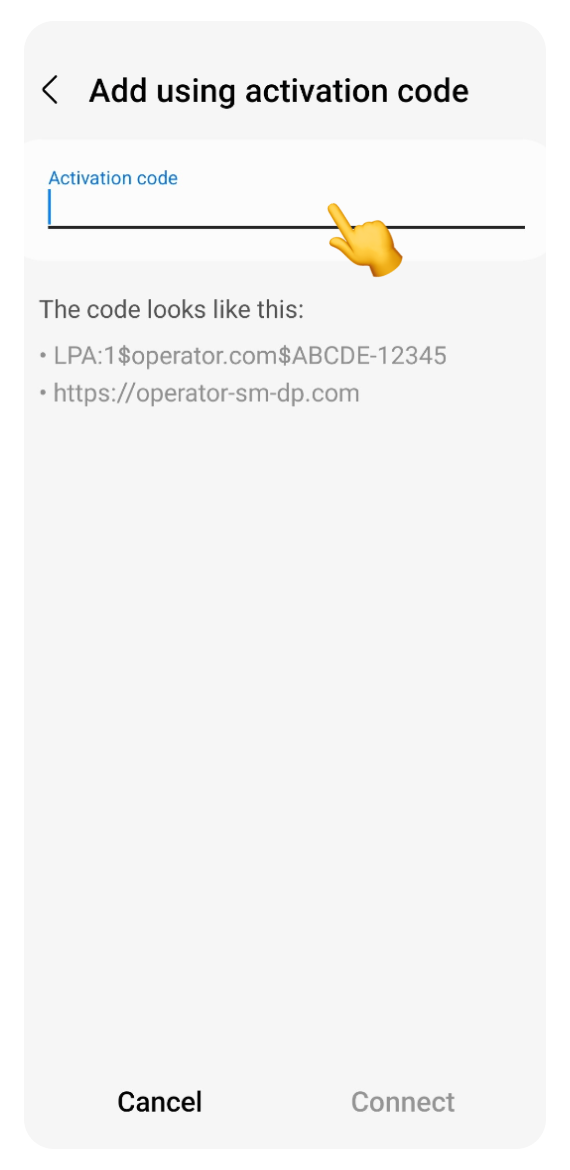
Long press to paste the code on the "Add using activation code" screen.
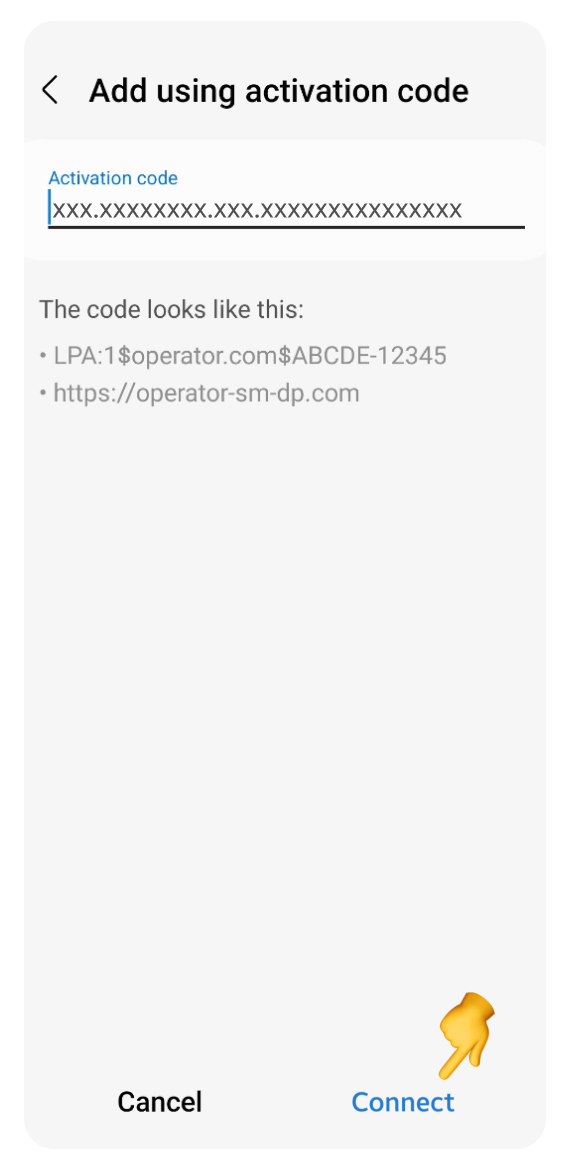
Tap Connect.
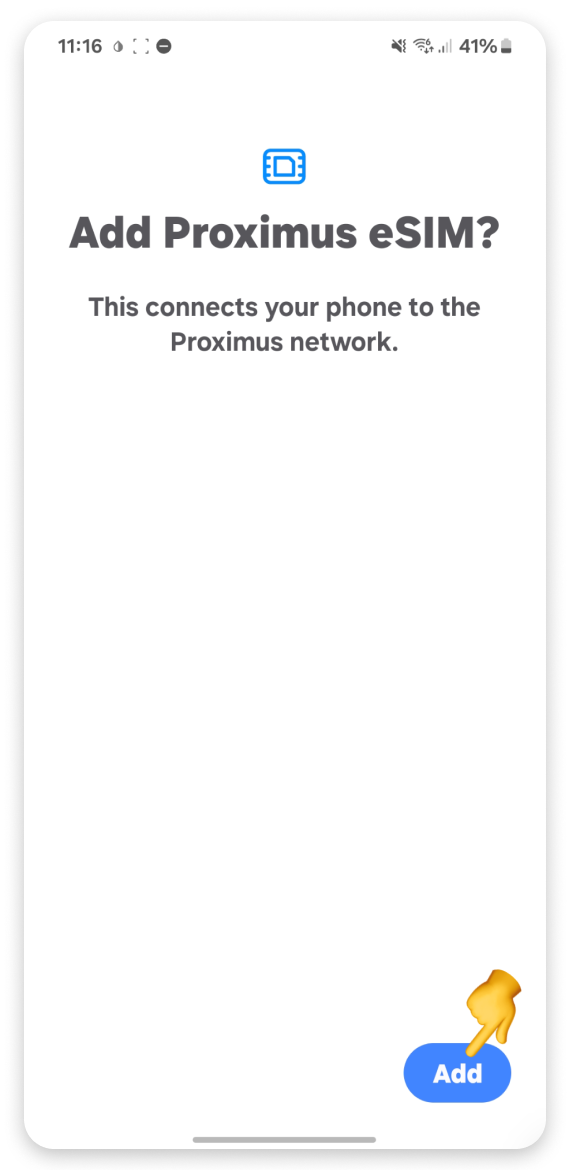
Tap Add. Don't worry if you see a different eSIM name than the one shown here - it varies based on the location you purchased it for.
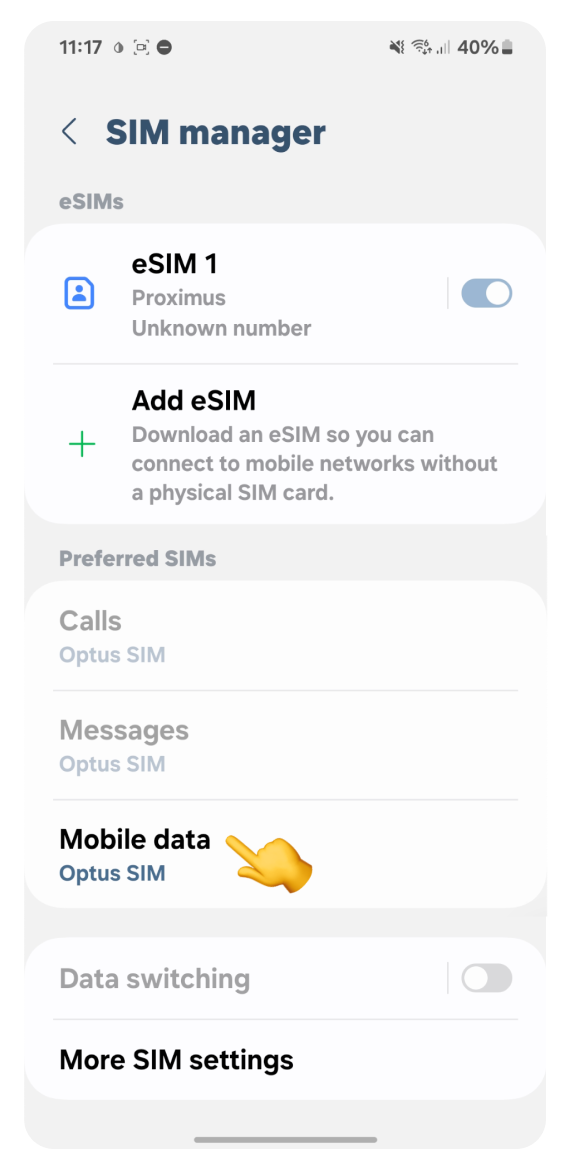
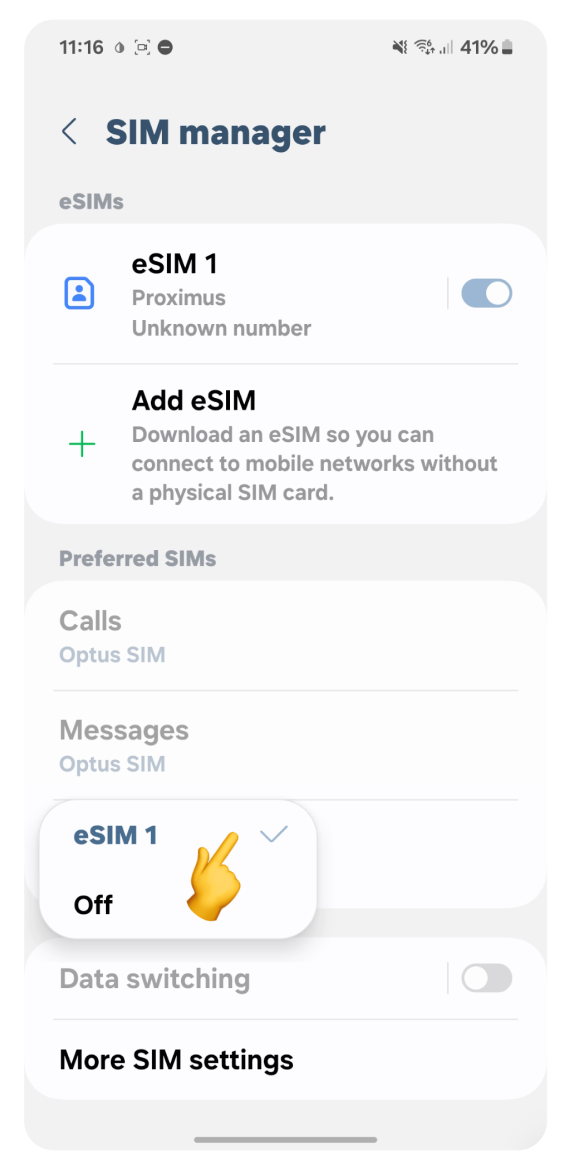
In the Preferred SIMs section:
Tap Calls and select your primary SIM.
Tap Messages and select your primary SIM.
Tap Mobile data and select your new eSIM.
Make sure Data switching is off.
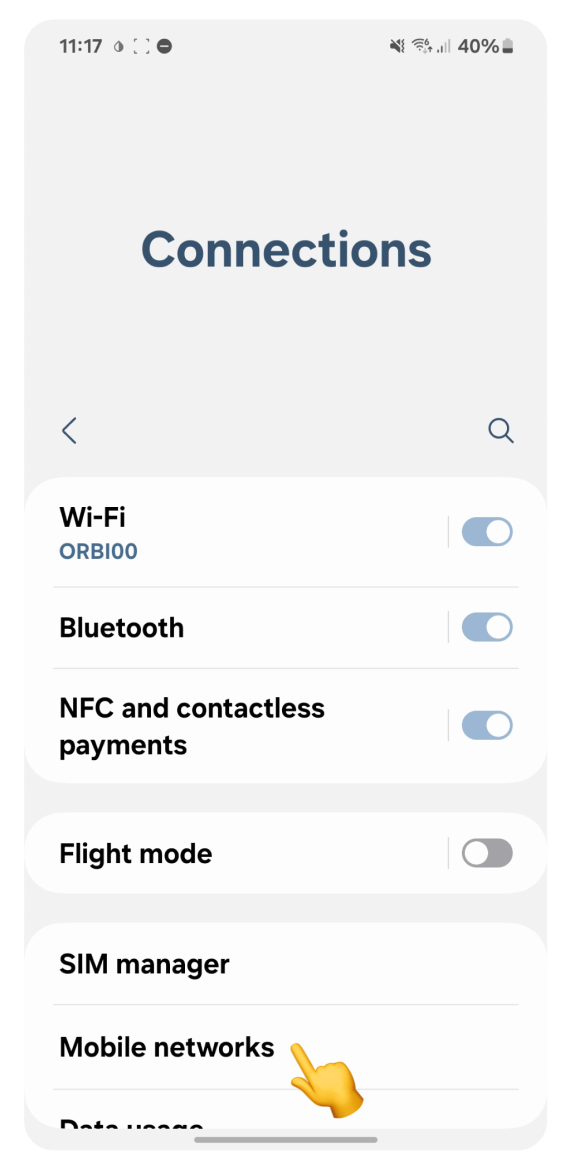
Go back to Connections:
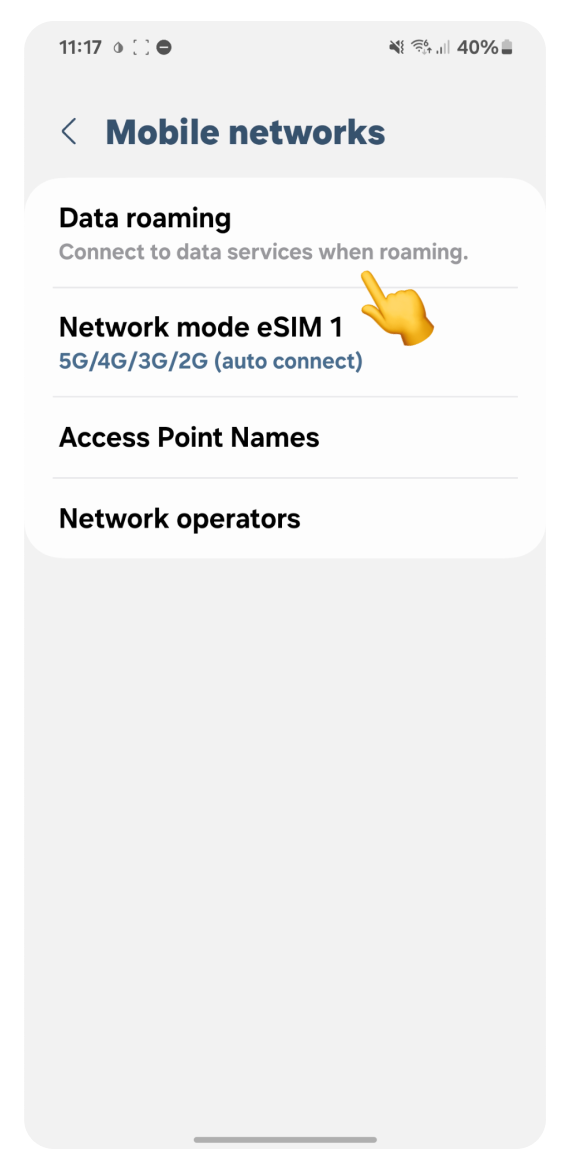
Tap Mobile networks.
In Mobile networks:
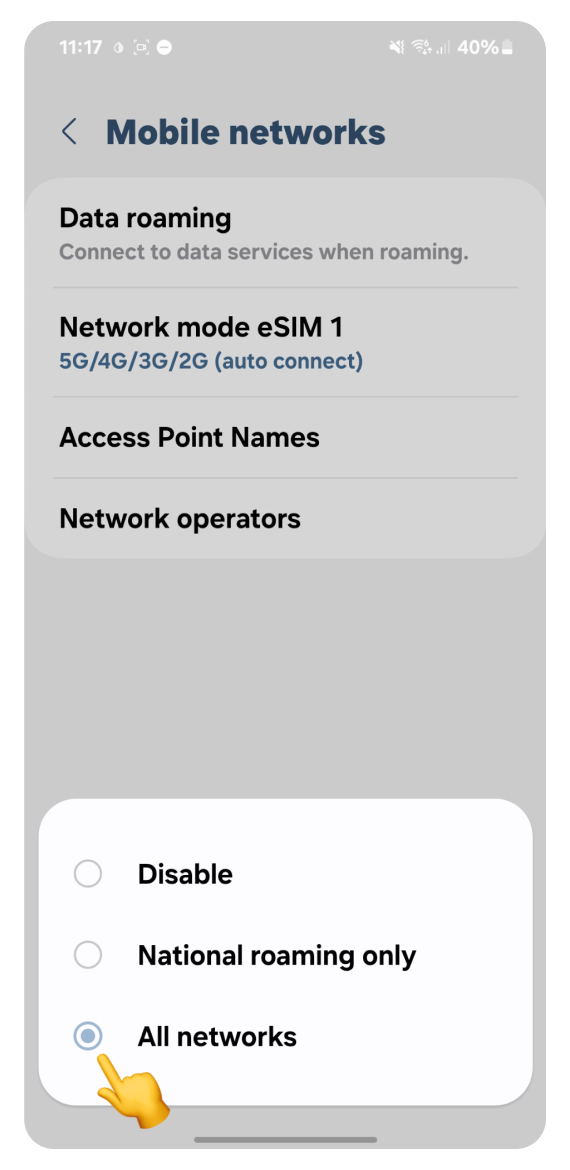
Tap Data roaming.
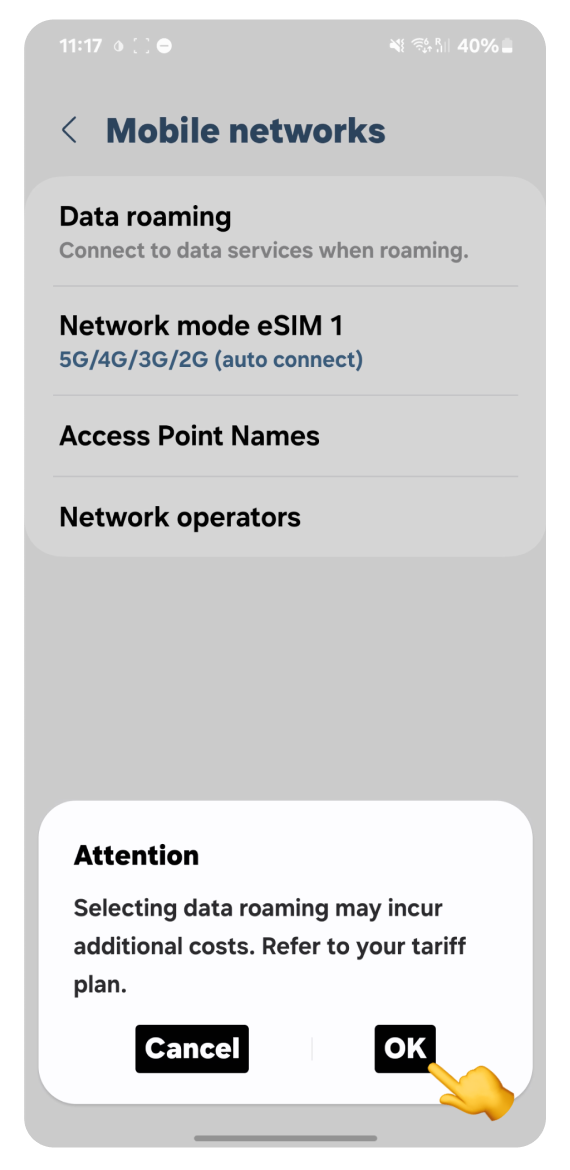
Select All networks.
In the "Attention" pop-up, tap OK.
Turn off Wi-Fi and try browsing the internet. Once your data is active, you’ll receive an SMS confirmation of successful activation.
If you used the WonderConnect mobile app:
Return to the guide and tap, I completed the activation.
On the status screen, tap Close.
 You’re all set! Enjoy staying online.