Please follow the steps dedicated to your Android version:
Before you begin, make sure you have a stable internet connection - this is critical for a successful installation.
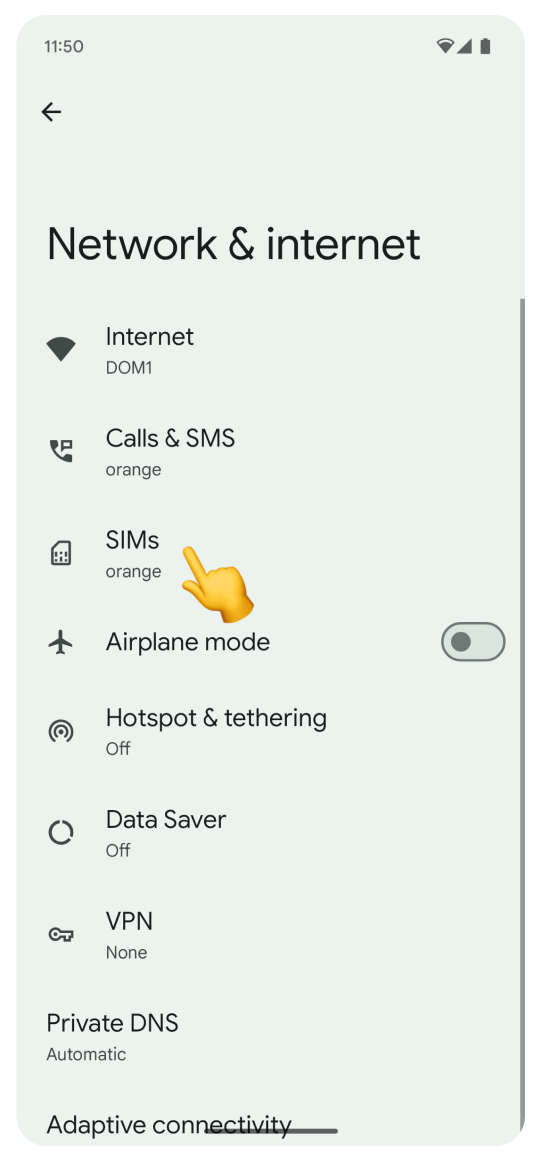
Go to Settings:
Open Network & internet section.
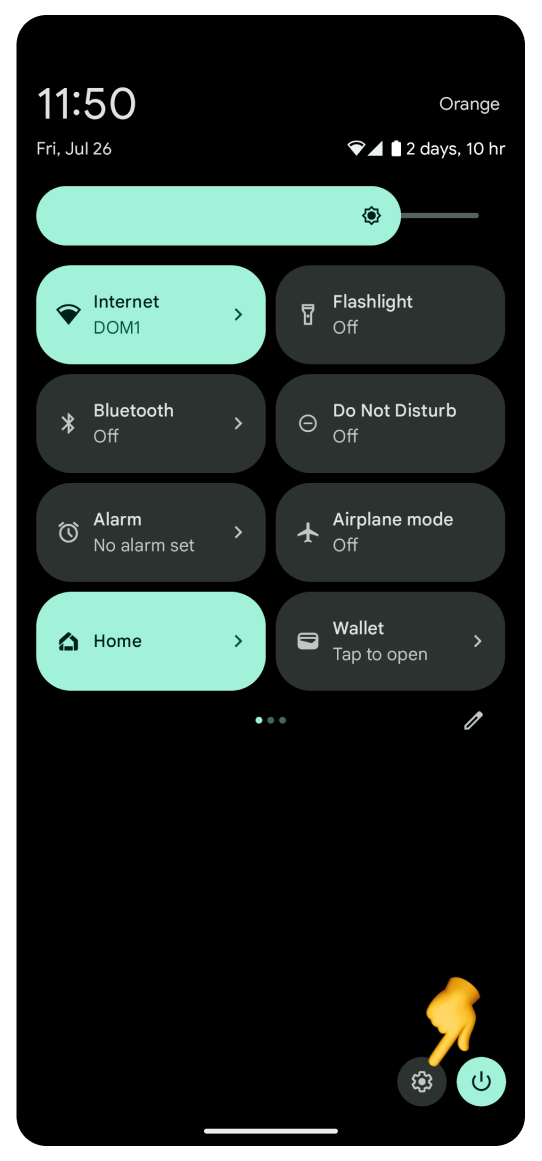

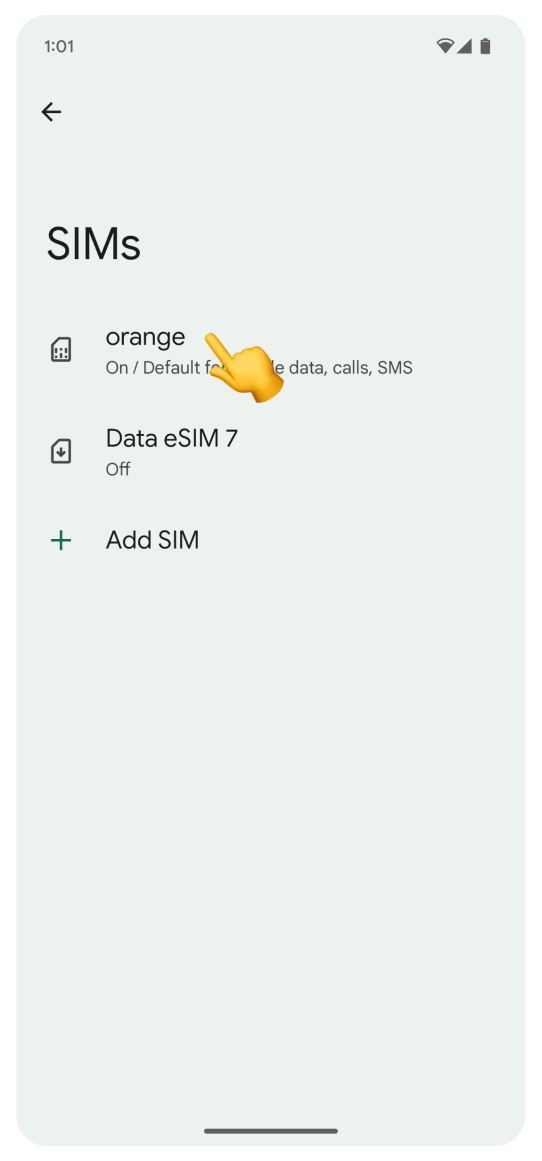
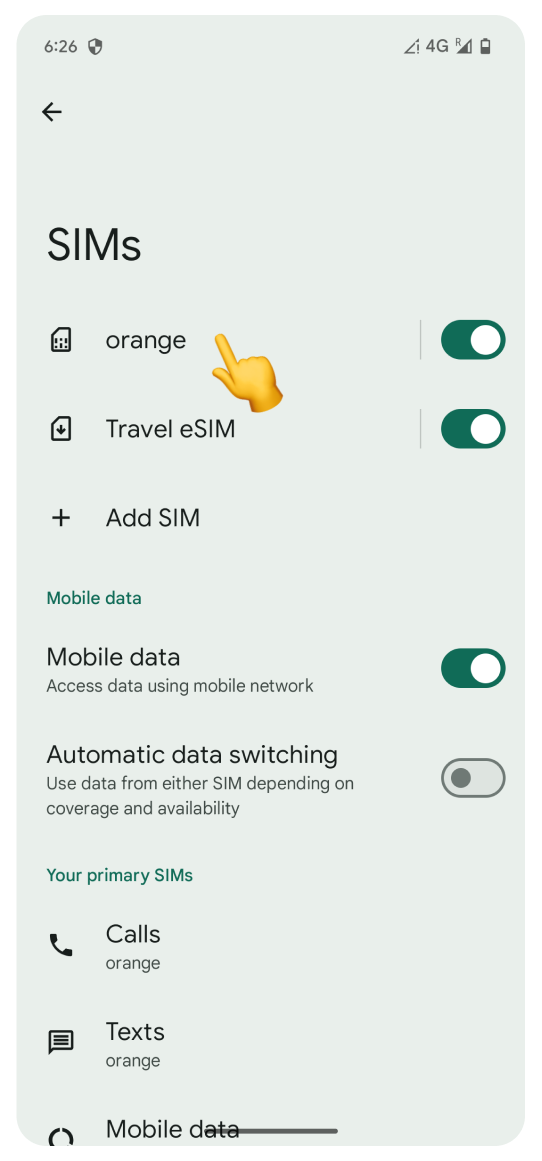
Tap SIMs.
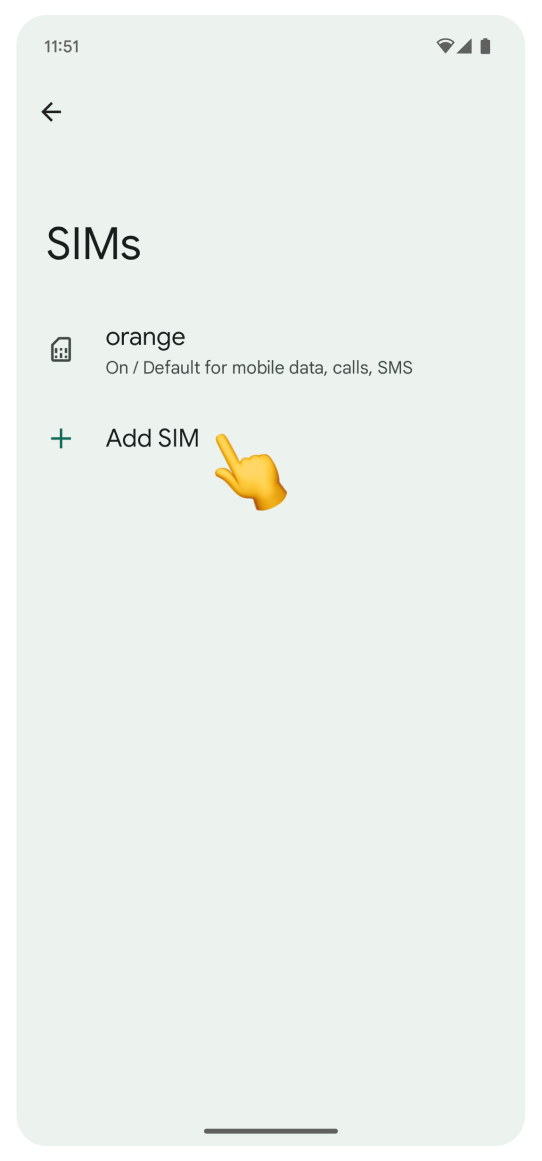
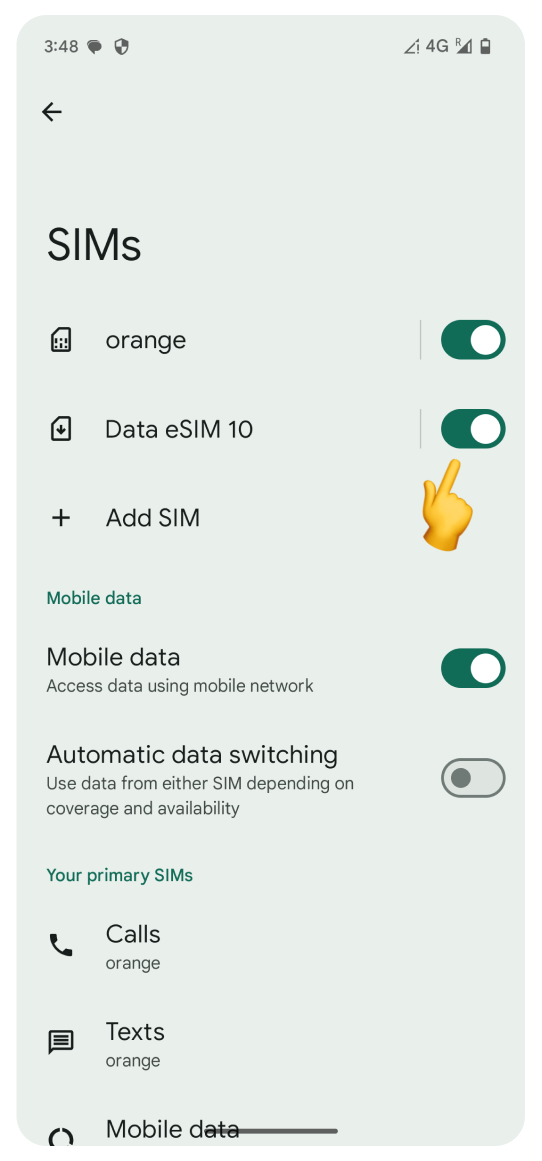
Tap + Add SIM
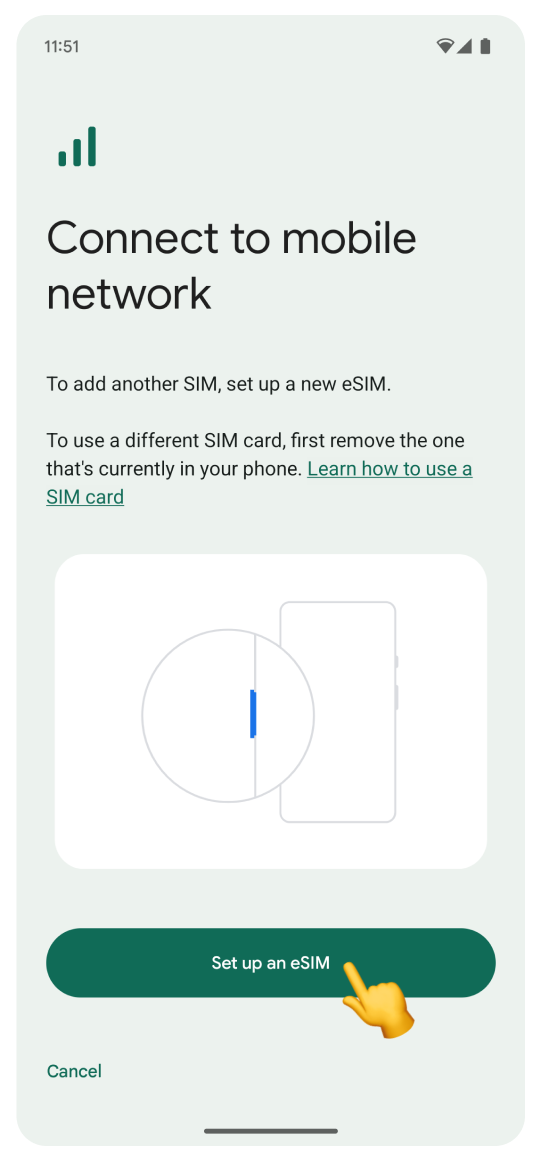
Tap Set up an eSIM. The “Checking network info…” screen will appear. Loading on this screen may take a while. Please don't interrupt the process.


Log in to the account you used to purchase your travel eSIM:
Go to Your Account.
Click Complete eSIM setup on your eSIM view.
Click the “No app” tab in the pop-up.
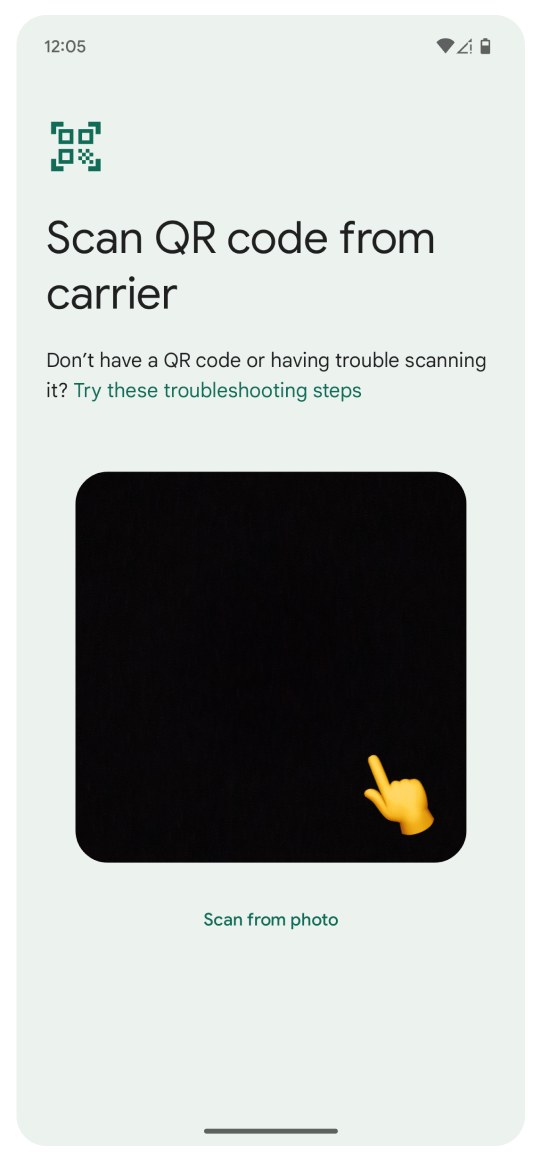
Scan the QR code.
If you can’t log in to your account:
Open the purchase confirmation email sent right after you bought the eSIM.
Scroll to find the QR code and scan it with your camera.

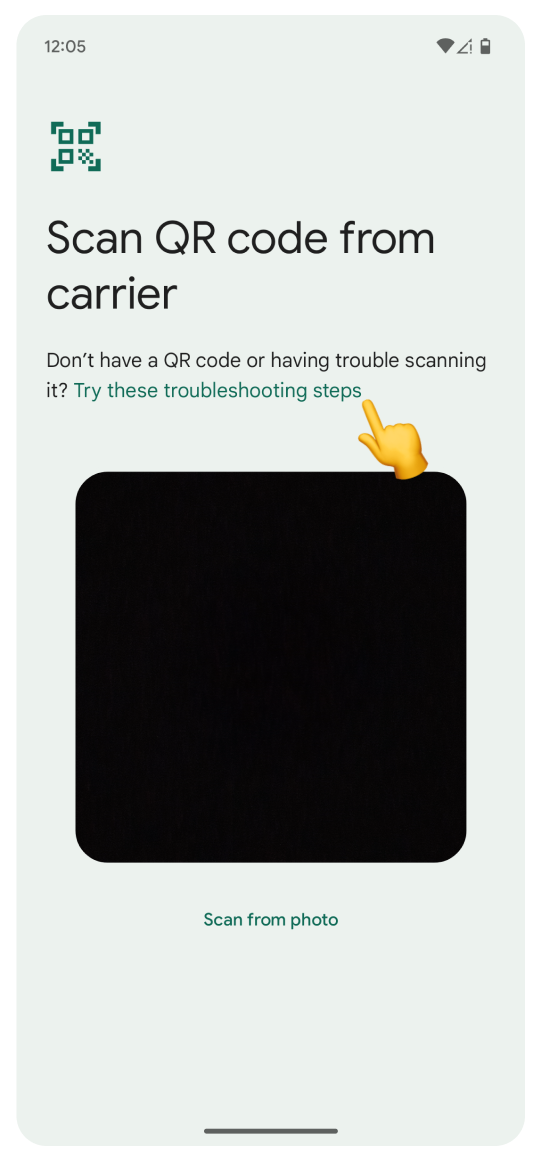
If you can't scan the code:
Tap Try these troubleshooting steps.
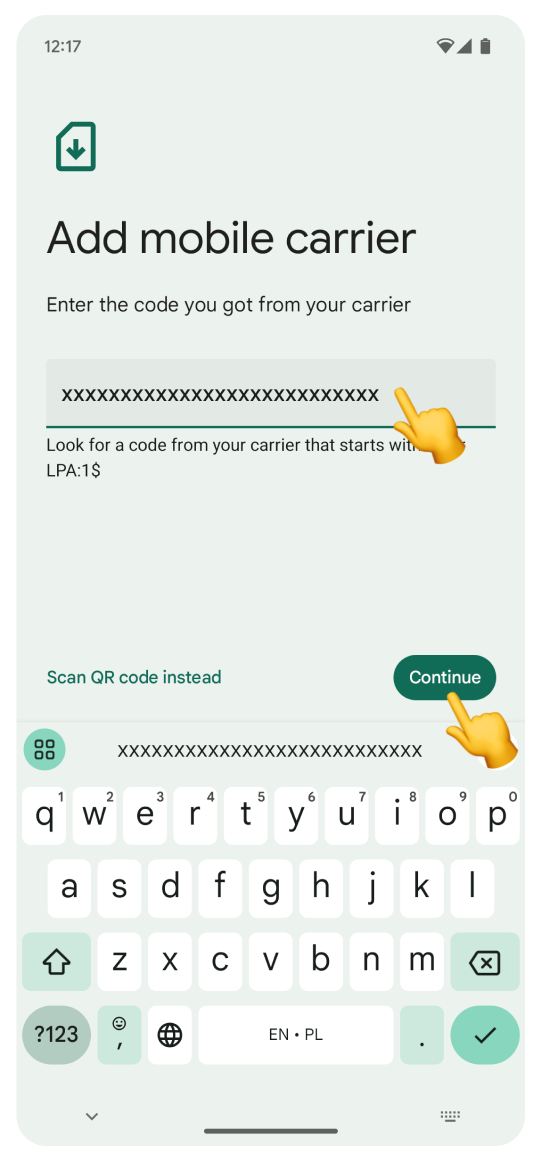
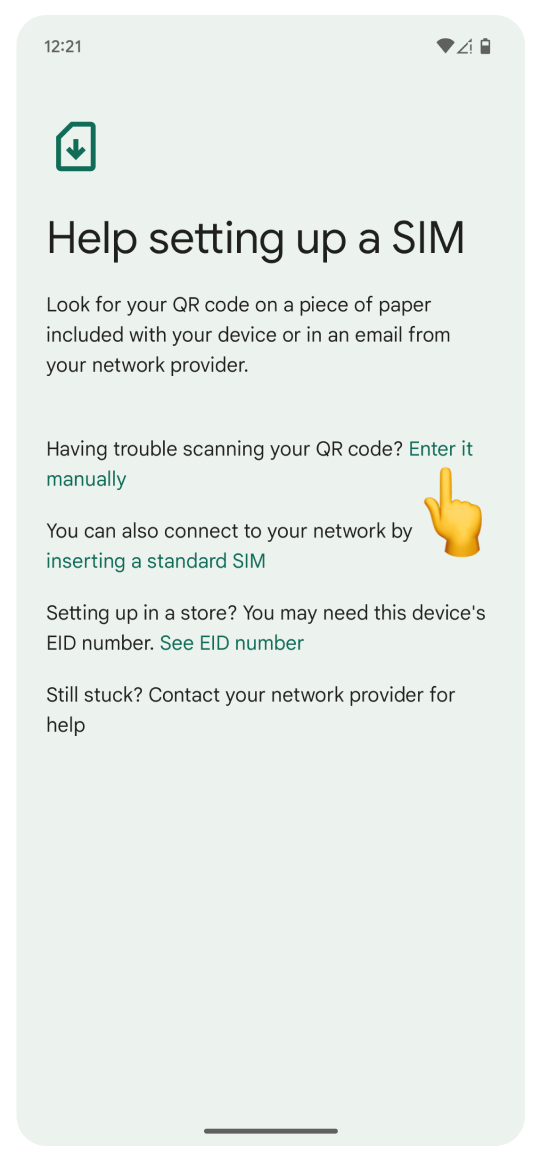
Tap Enter it manually.


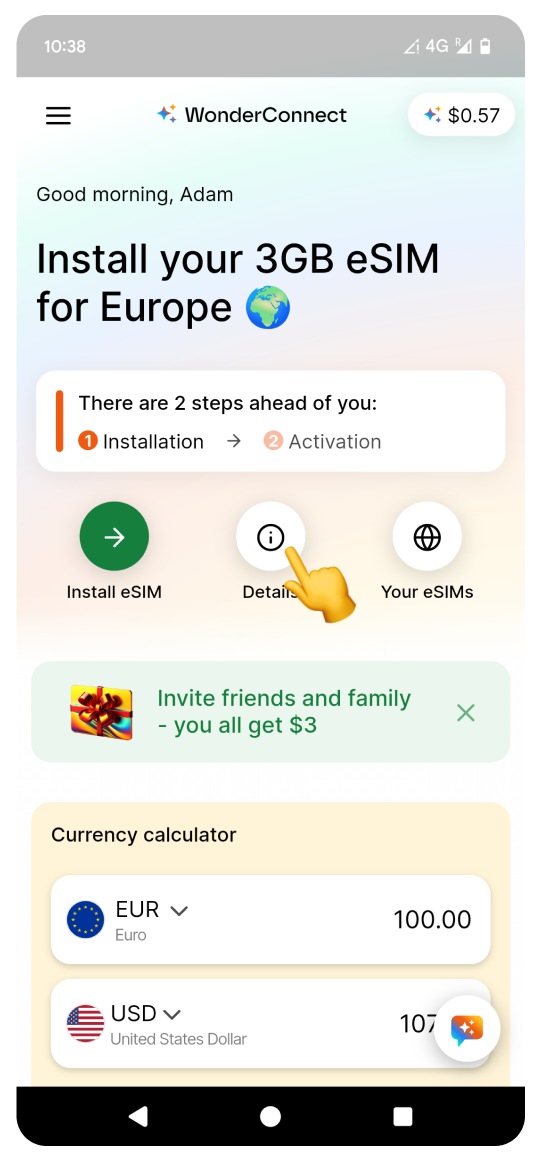
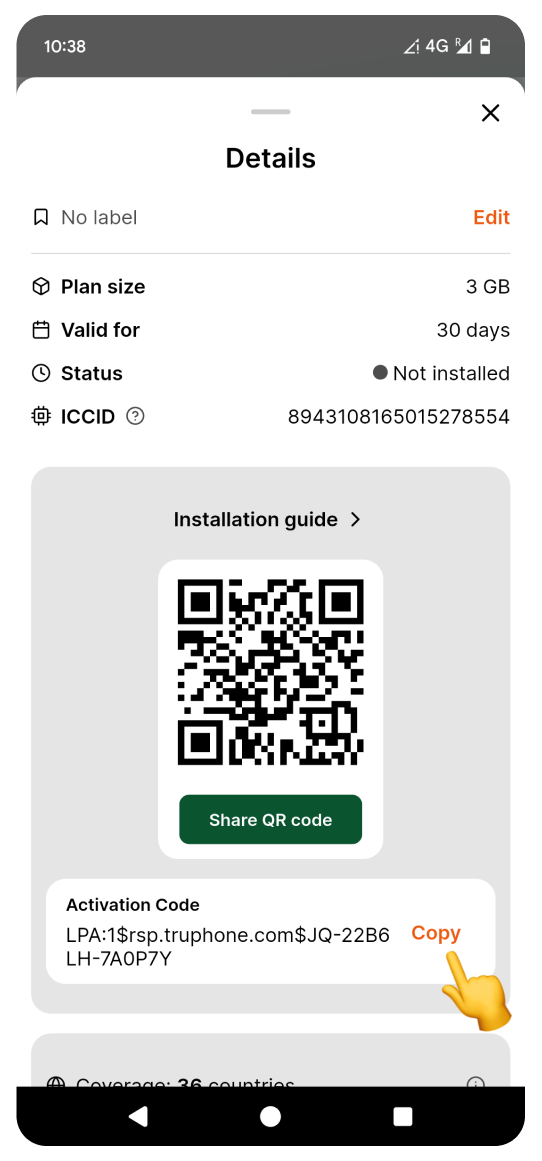
Open the WonderConnect mobile app:
Tap Details on the home screen.
Copy the Activation Code.


Go back to the settings screen:
Long press to paste the code.
Tap Continue.
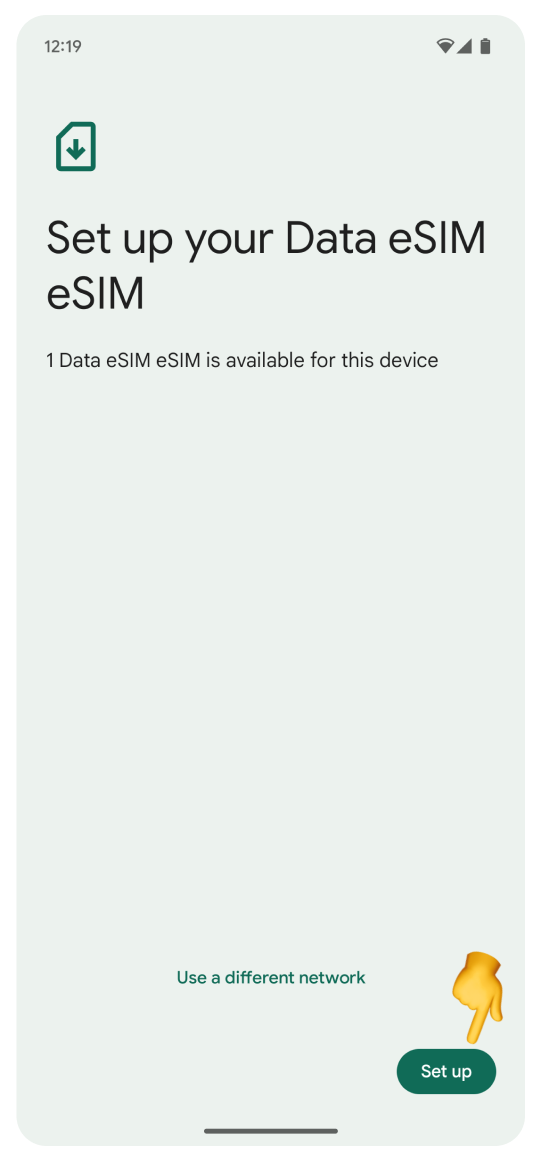
Tap Set up.
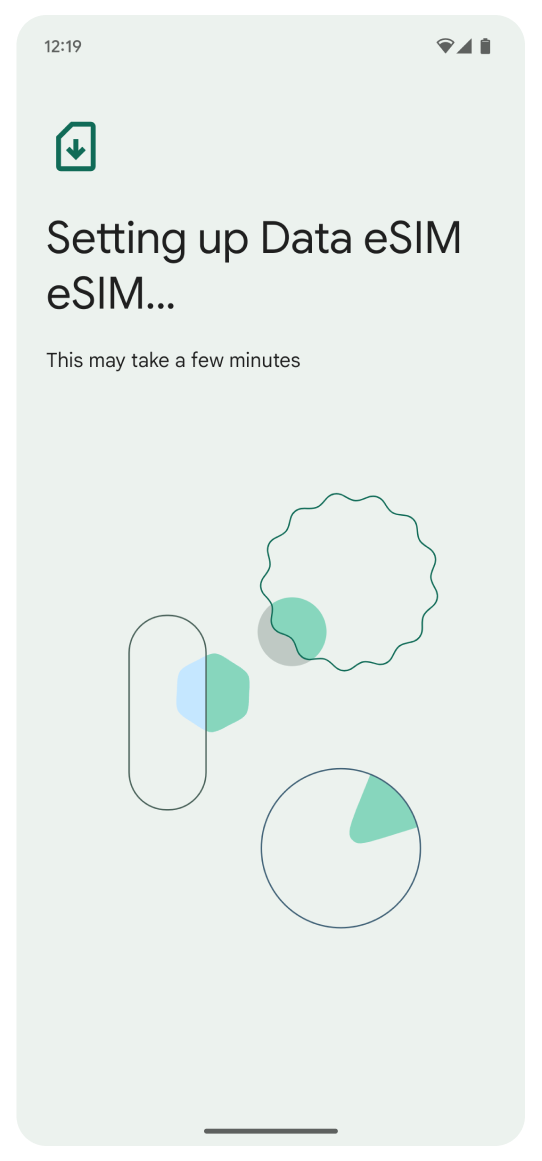
Don't worry if you see a different eSIM name than the one shown here - it varies based on the location you purchased it for. Next, you will see a loading screen. Please do not interrupt the process.
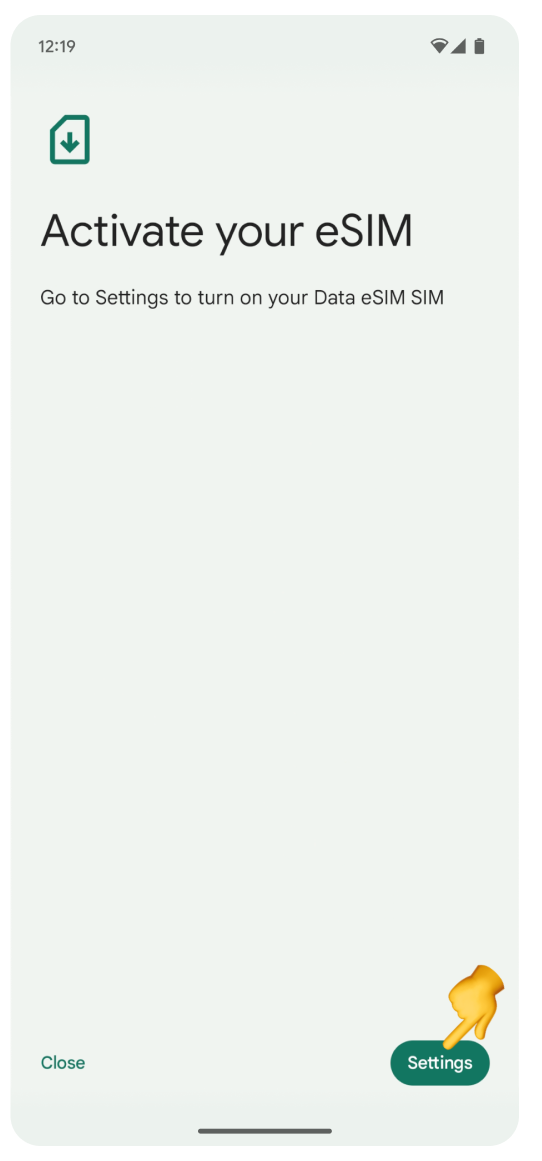
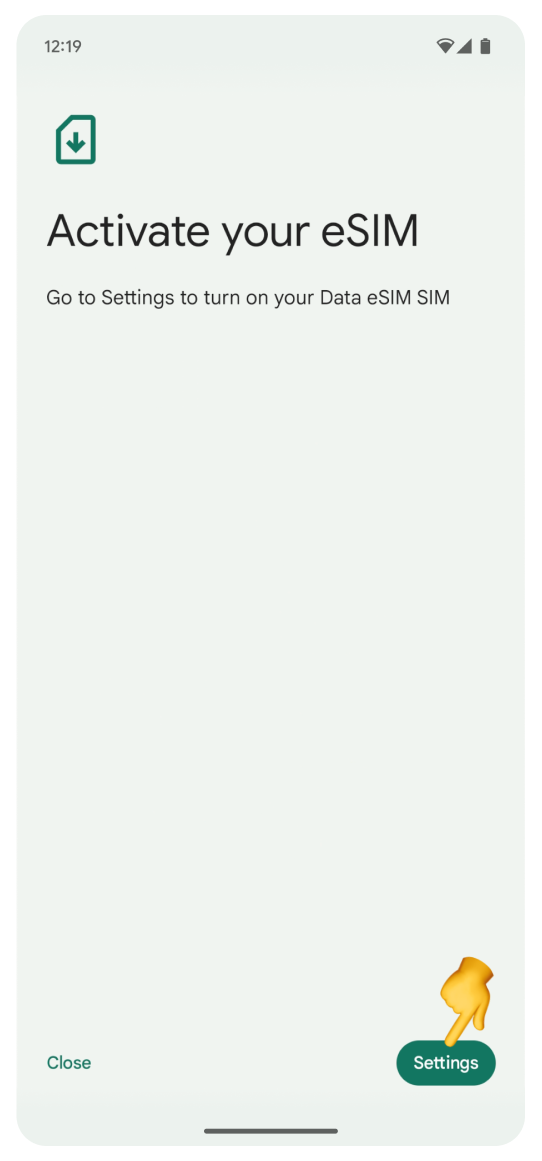
On the “Activate your eSIM” screen:
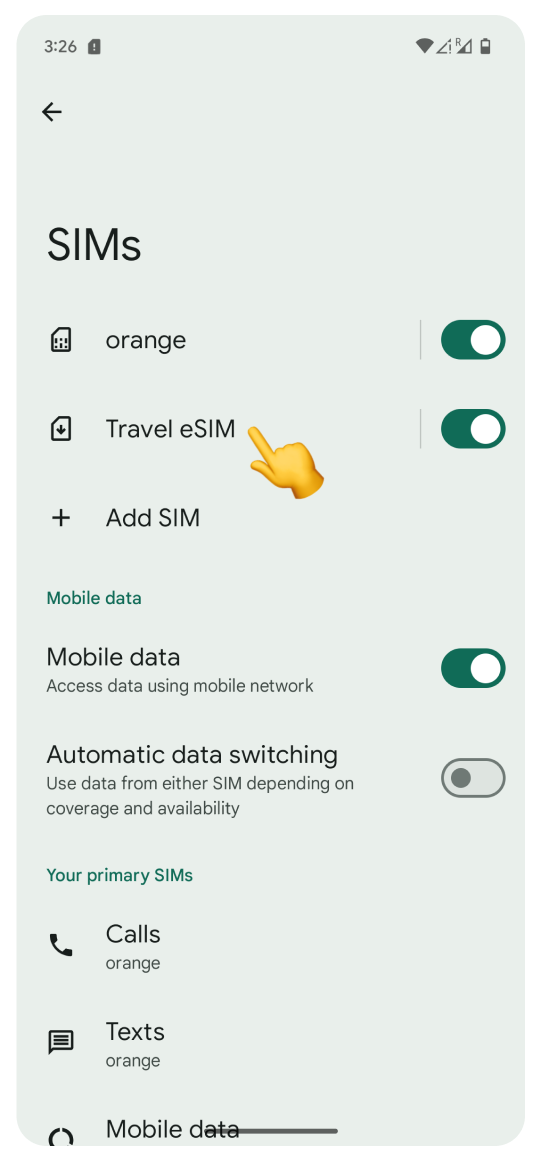
Tap Settings.
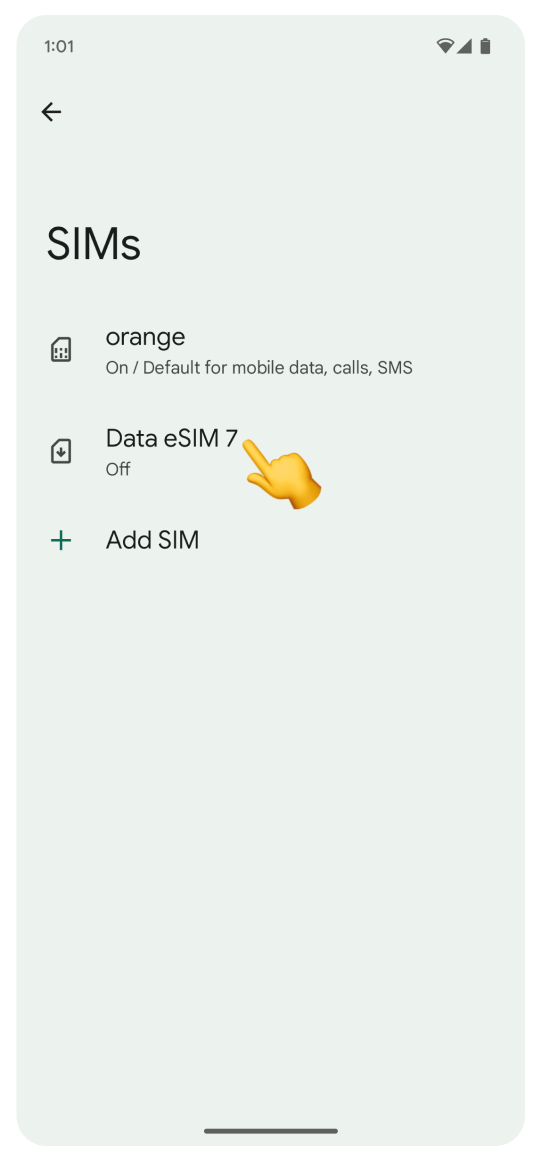
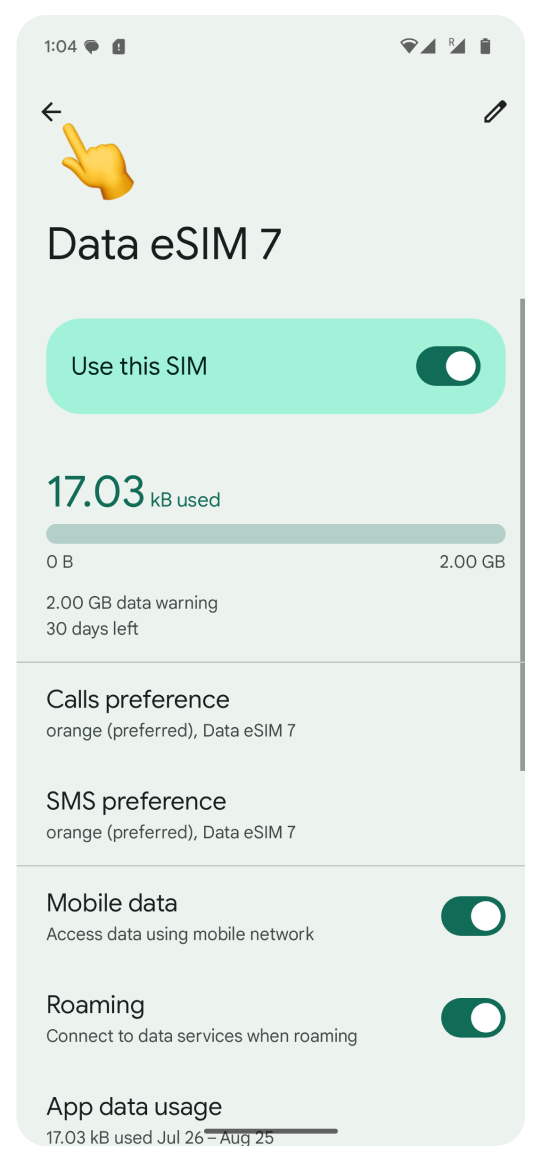
Tap your new eSIM. It’s likely to be labeled Data eSIM.
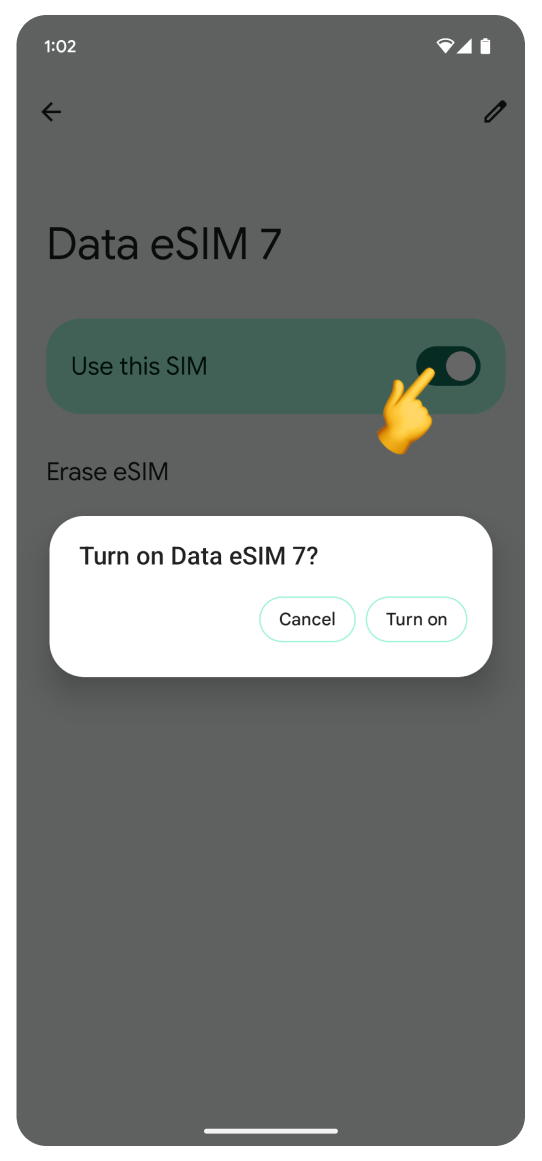
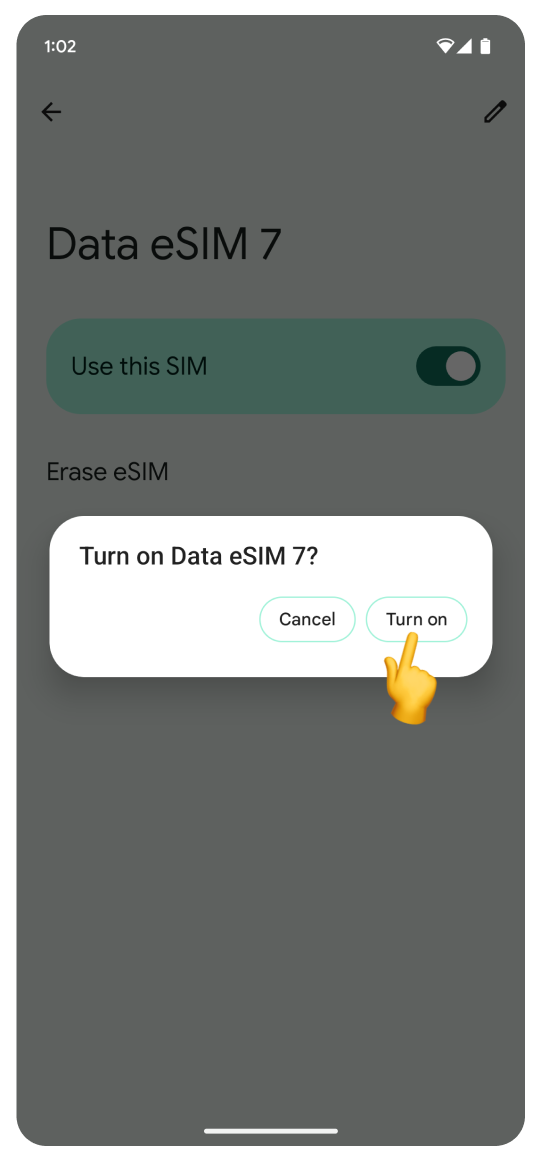
Tap the toggle in the Use this SIM section to turn the eSIM on.
In the pop-up, confirm your choice and tap Turn on.
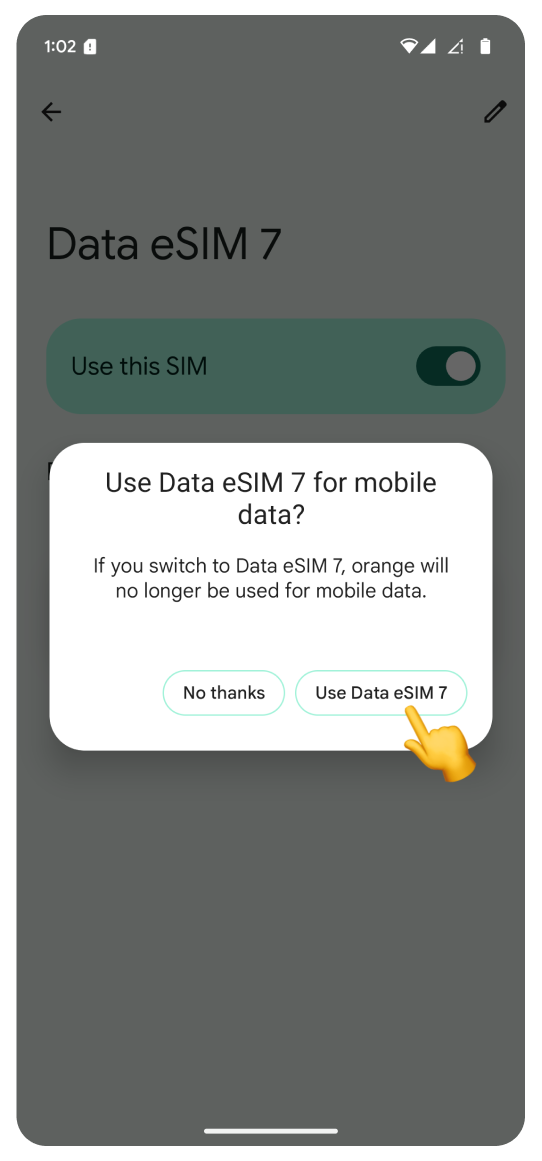
In the “Use eSIM for mobile data” pop-up:
Tap “Use Data eSIM”. This button may be labeled differently, depending on the name of your eSIM.
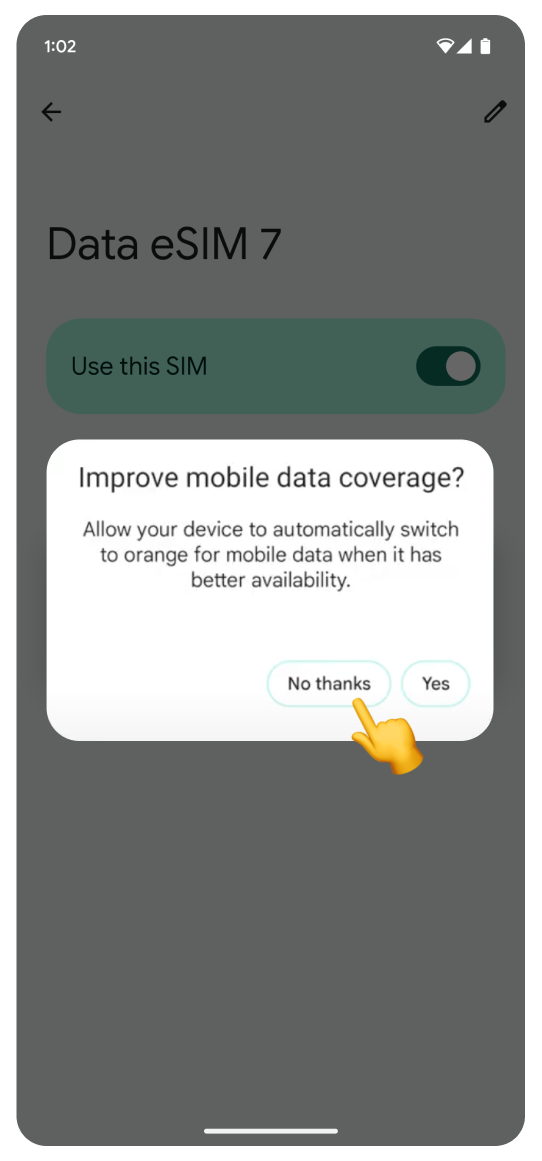
In the “Improve mobile data coverage” pop-up:
Tap No thanks.
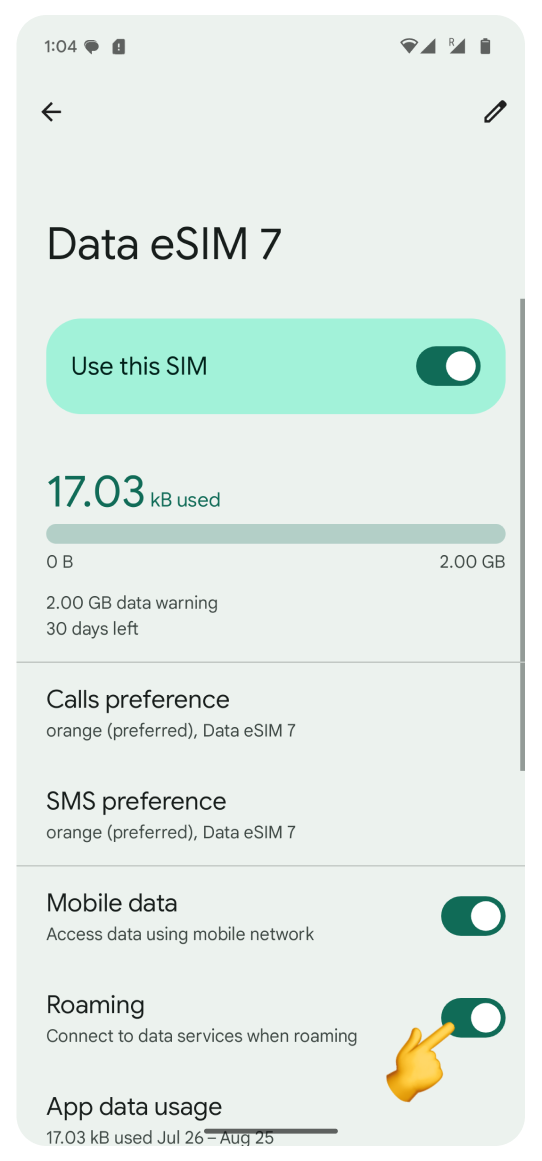
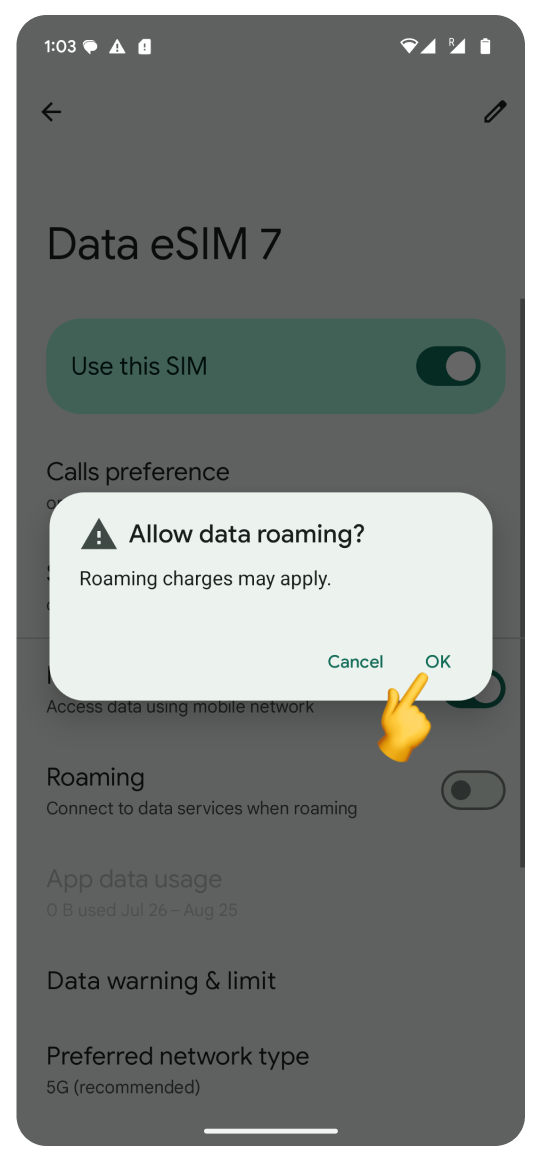
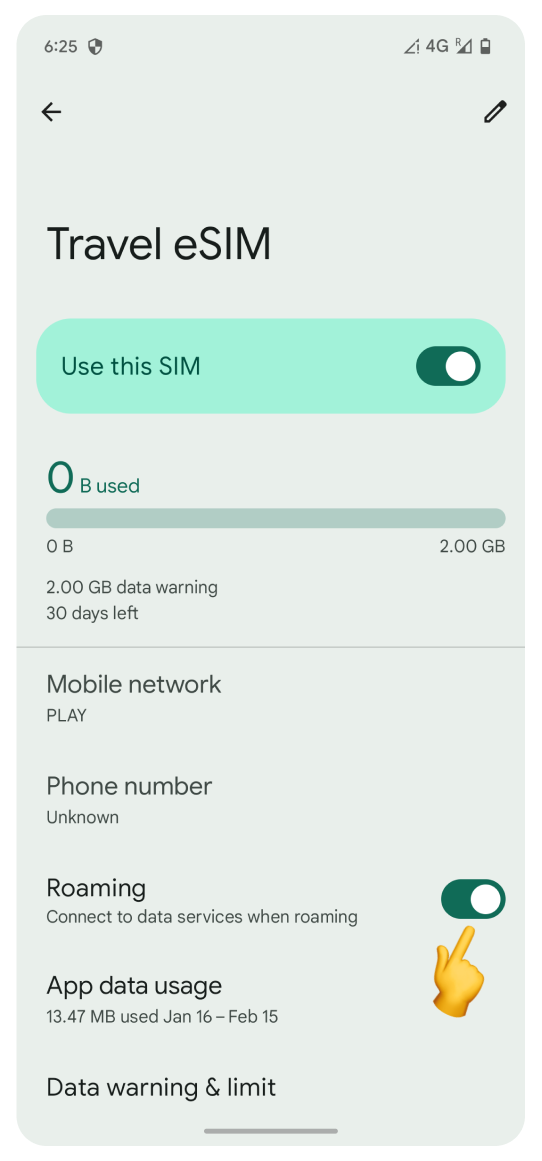
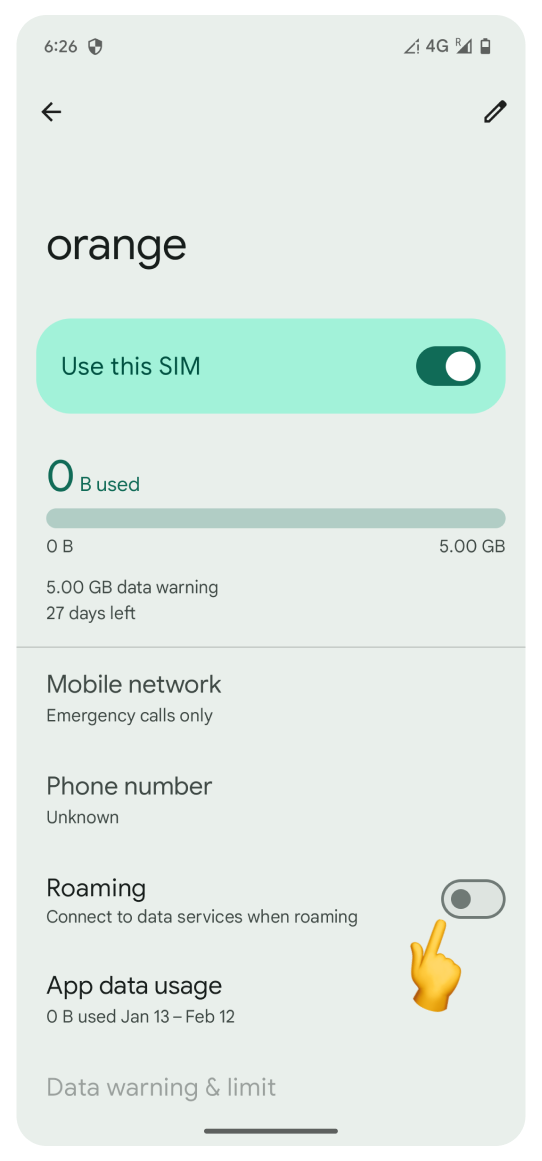
Scroll down and turn on roaming:
Tap the Roaming toggle.
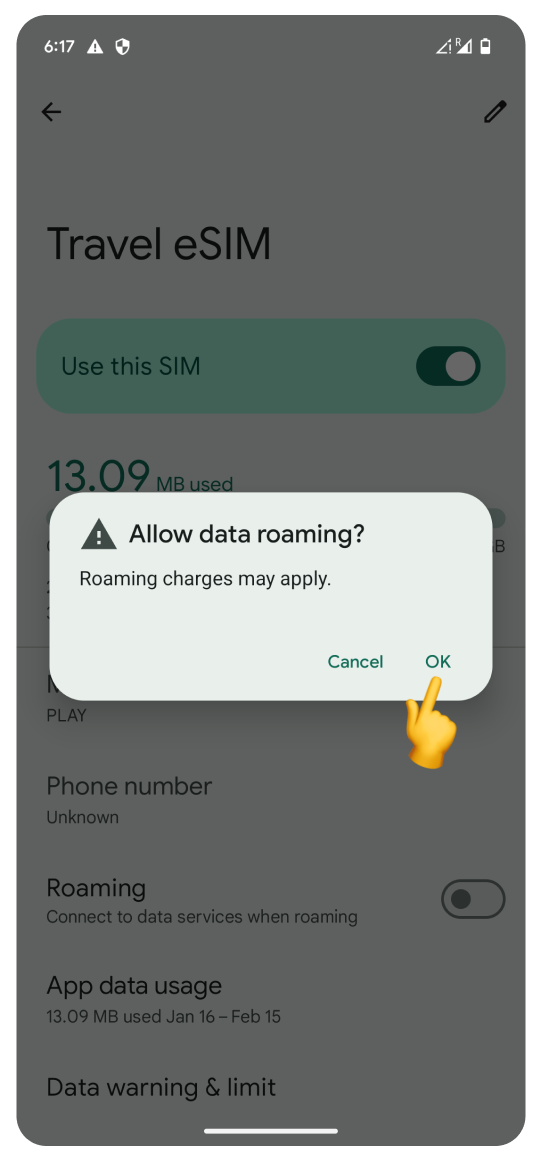
In the “Allow data roaming?” pop-up tap OK.
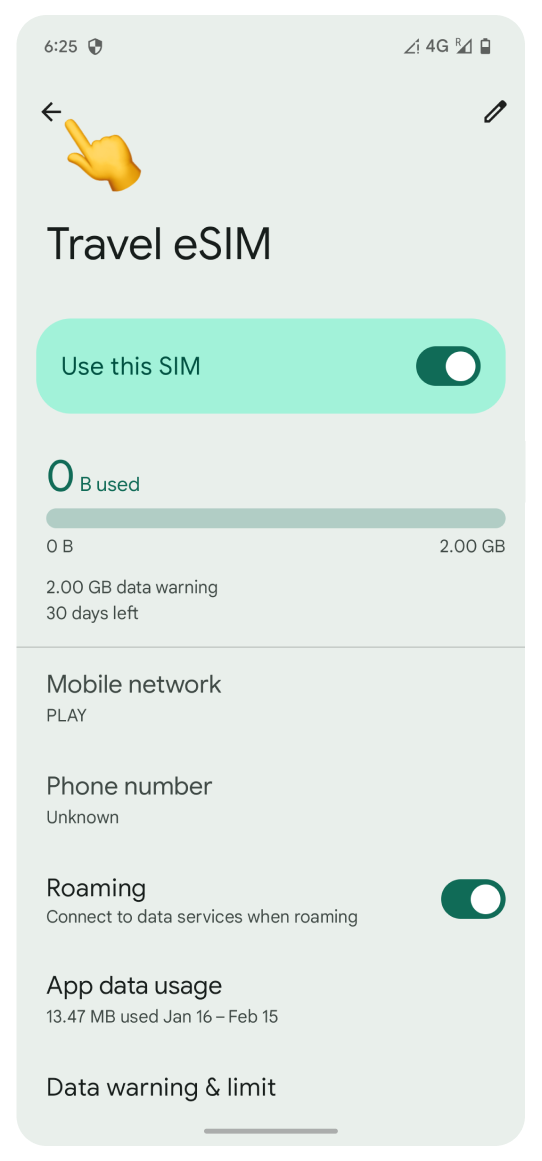
Tap the arrow to return to SIMs settings:
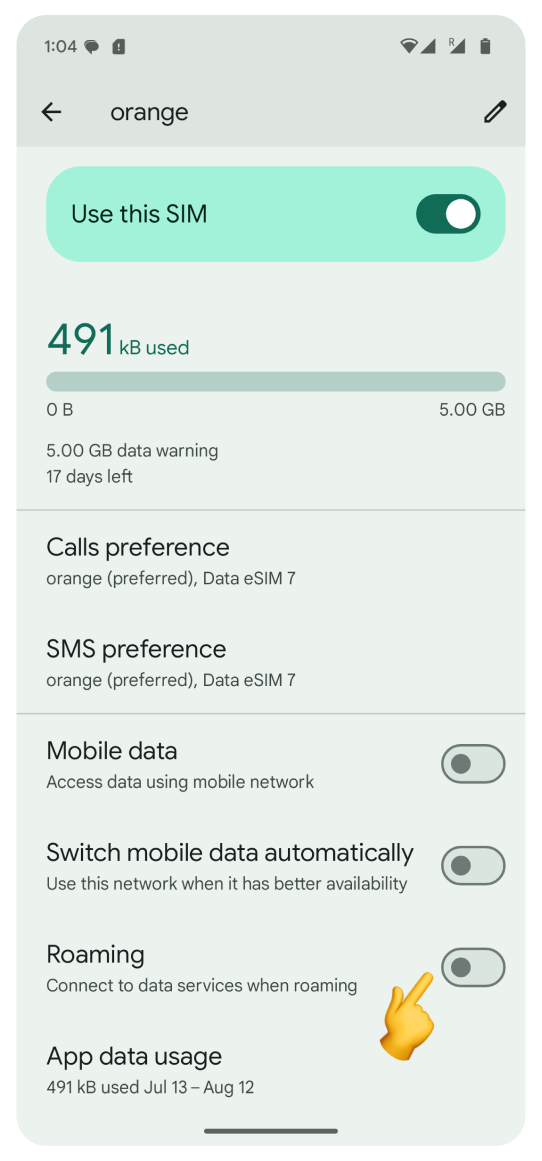
Tap the eSIM with your home country number.
Turn off Roaming.
Turn off Wi-Fi and try browsing the internet. Once your data is active, you’ll receive an SMS confirmation of successful activation.
If you used the WonderConnect mobile app:
Return to the guide and tap, I completed the installation.
On the status screen, tap Close.
🎉 You’re all set! Enjoy staying online.
Before you begin, make sure you have a stable internet connection - this is critical for a successful installation.
Go to Settings:
Open Network & internet section.


Tap SIMs.
Tap + Add SIM
Tap Set up an eSIM. The “Checking network info…” screen will appear. Loading on this screen may take a while. Please don't interrupt the process.
Log in to the account you used to purchase your travel eSIM:
Go to Your Account.
Click Complete eSIM setup on your eSIM view.
Click the “No app” tab in the pop-up.
Scan the QR code.
If you can’t log in to your account:
Open the purchase confirmation email sent right after you bought the eSIM.
Scroll to find the QR code and scan it.
If you can't scan the code:
Tap Try these troubleshooting steps.
Tap Enter it manually.
Open the WonderConnect mobile app:
Tap Details on the home screen.
Copy the Activation Code.

Go back to the settings screen:
Long press to paste the code.
Tap Continue.

Tap Set up.
Don't worry if you see a different eSIM name than the one shown here - it varies based on the location you purchased it for. Next, you will see a loading screen. Please do not interrupt the process.


On the “Activate your eSIM” screen:
Tap Settings.
Tap the toggle next to your new eSIM.
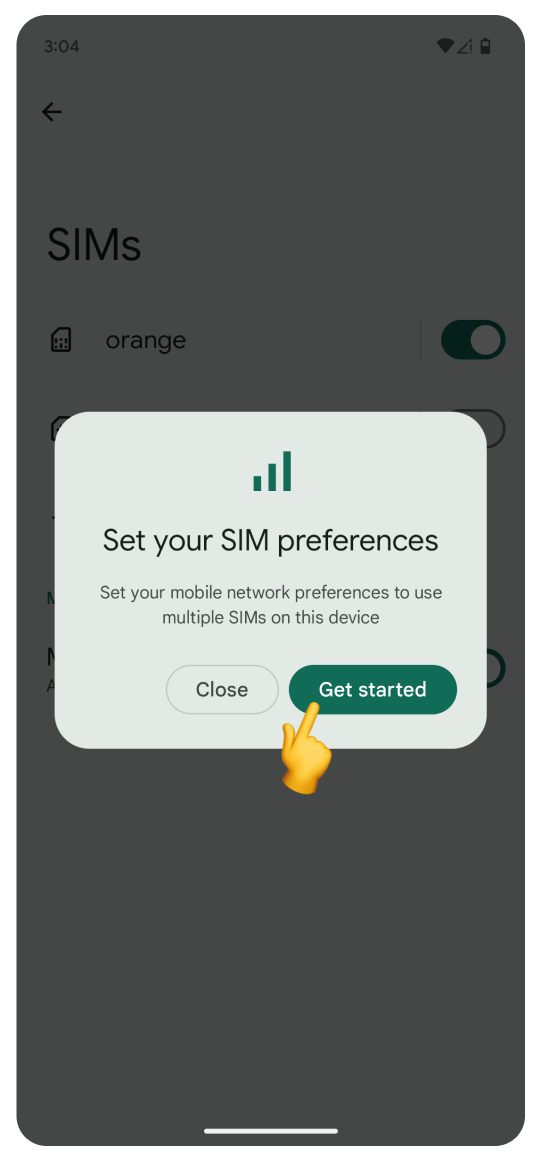
In the “Set your SIM preferences” pop-up, tap Get started.
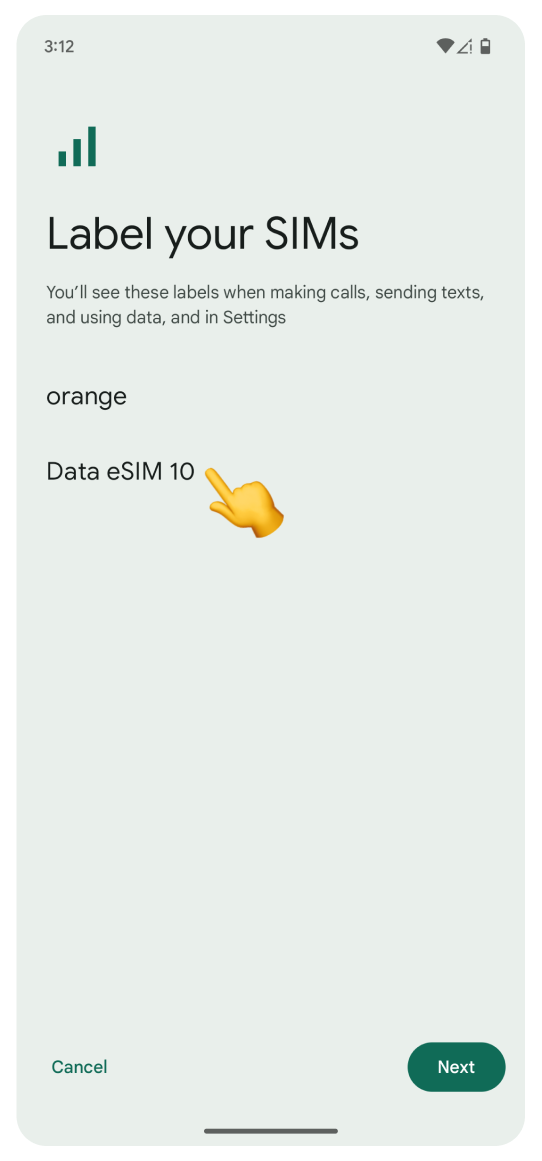
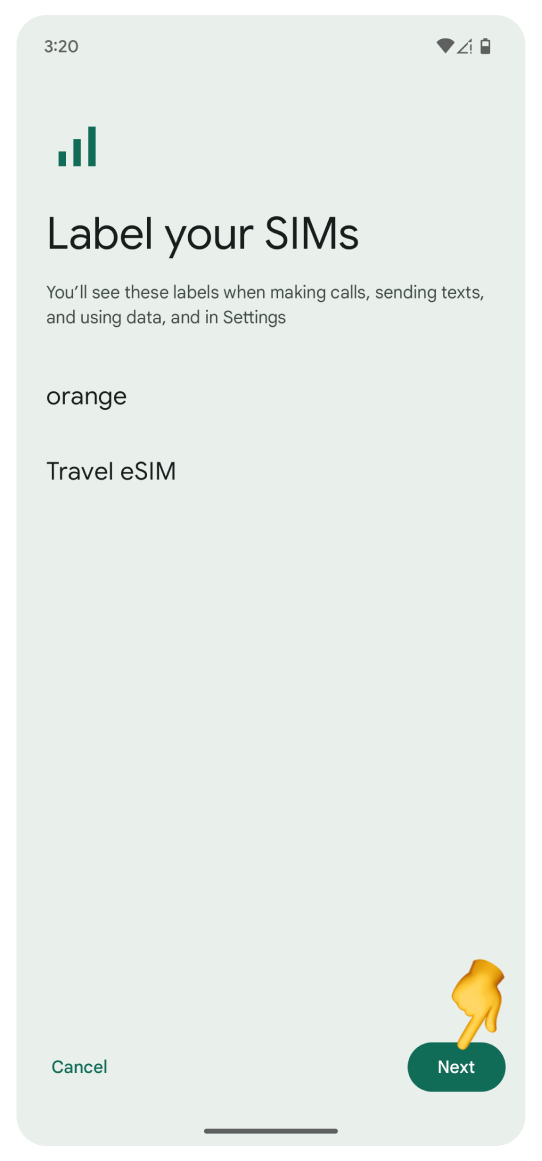
Tap your new eSIM to rename it:
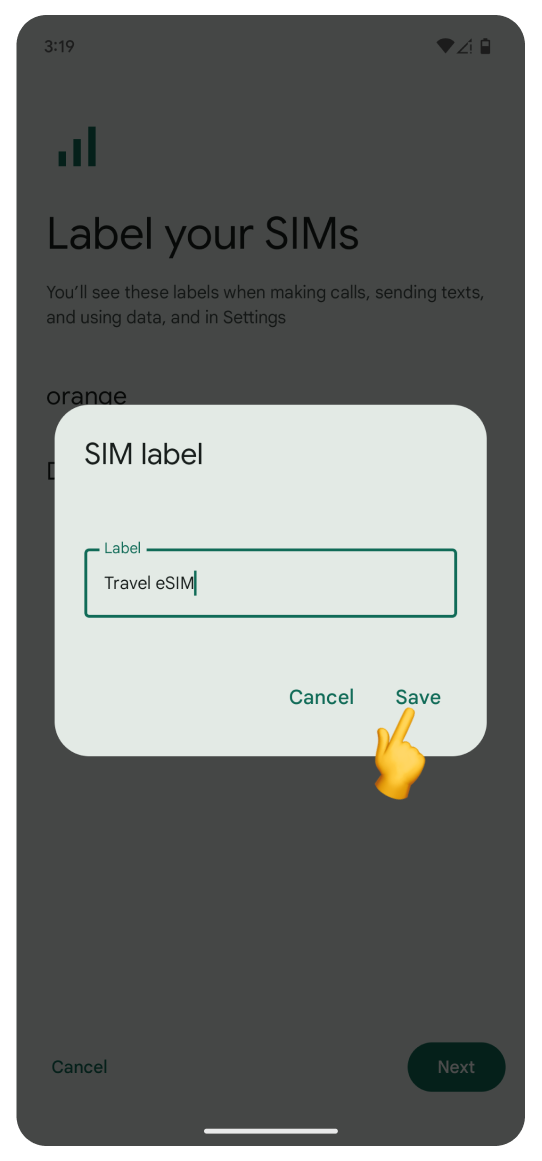
We suggest using Travel eSIM or the country name.
Tap Save.
Tap Next.
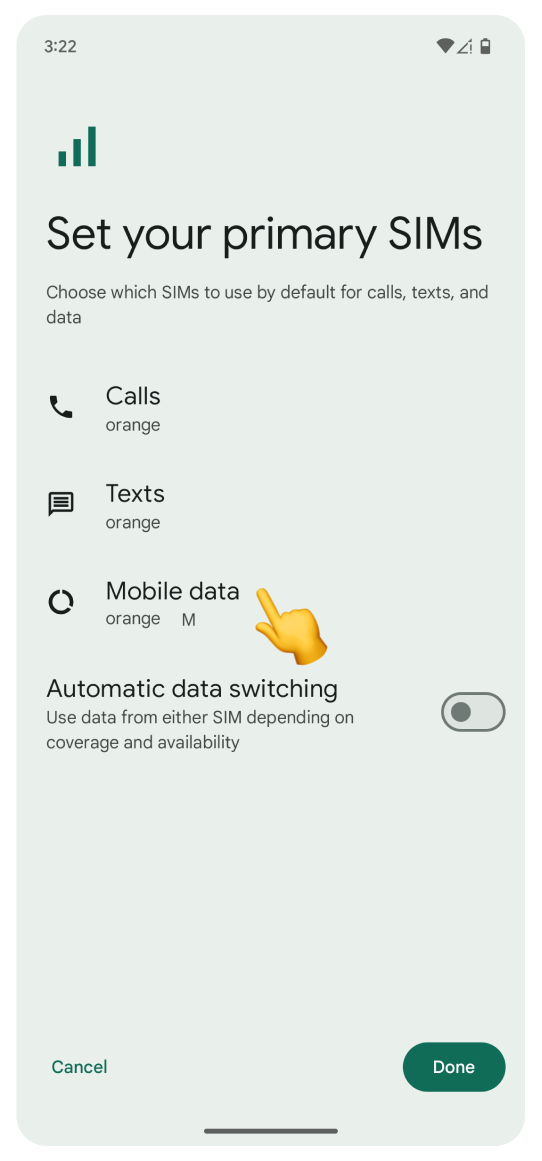
On the "Set your primary SIMs" screen:
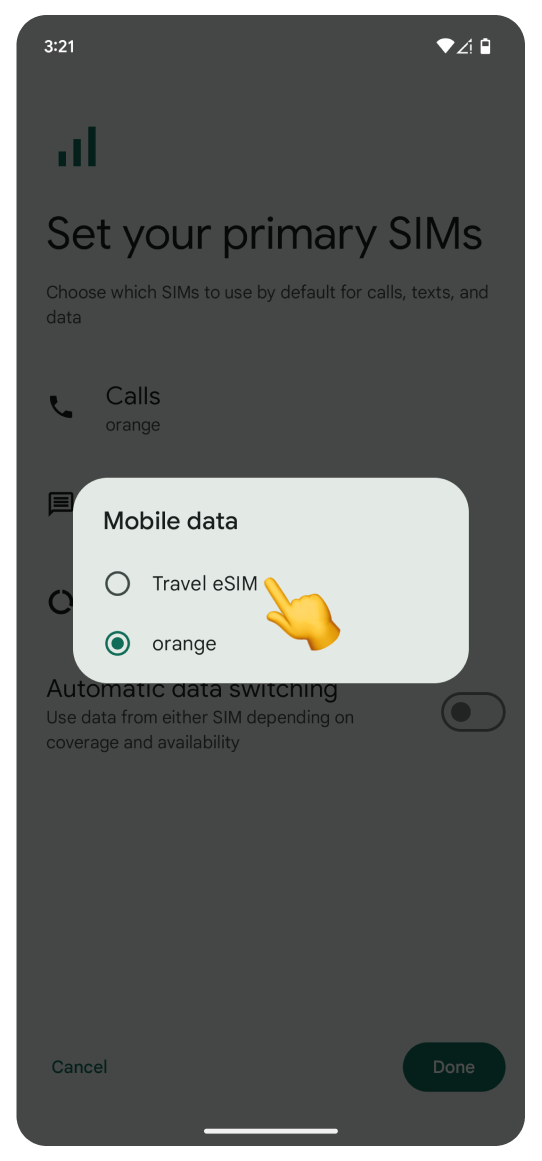
Tap Mobile data.
Select your Travel eSIM.
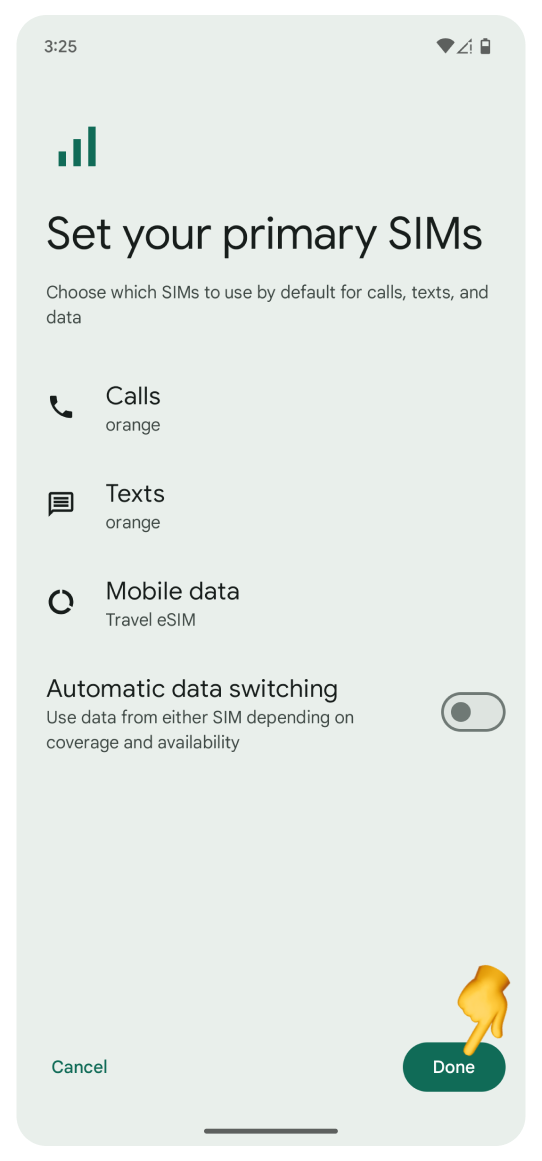
Make sure Automatic data switching is off.
Tap Done.
Tap your Travel eSIM:
Turn on Roaming.
In the “Allow data roaming” pop-up, tap OK.
Go back SIMs:
Tap your Primary number.
Turn off Roaming.
Turn off Wi-Fi and try browsing the internet. Once your data is active, you’ll receive an SMS confirmation of successful activation.
If you used the WonderConnect mobile app:
Return to the guide and tap, I completed the activation.
On the status screen, tap Close.
🎉 You’re all set! Enjoy staying online.