First, choose one of the following installation methods:
Installation With the WonderConnect Mobile App

This method is for iPhones with iOS 17.5 and laterIf your iPhone has an older iOS version, or you don't have the WonderConnect app, please
click here for the instructions. Start Installation in the WonderConnect Mobile App
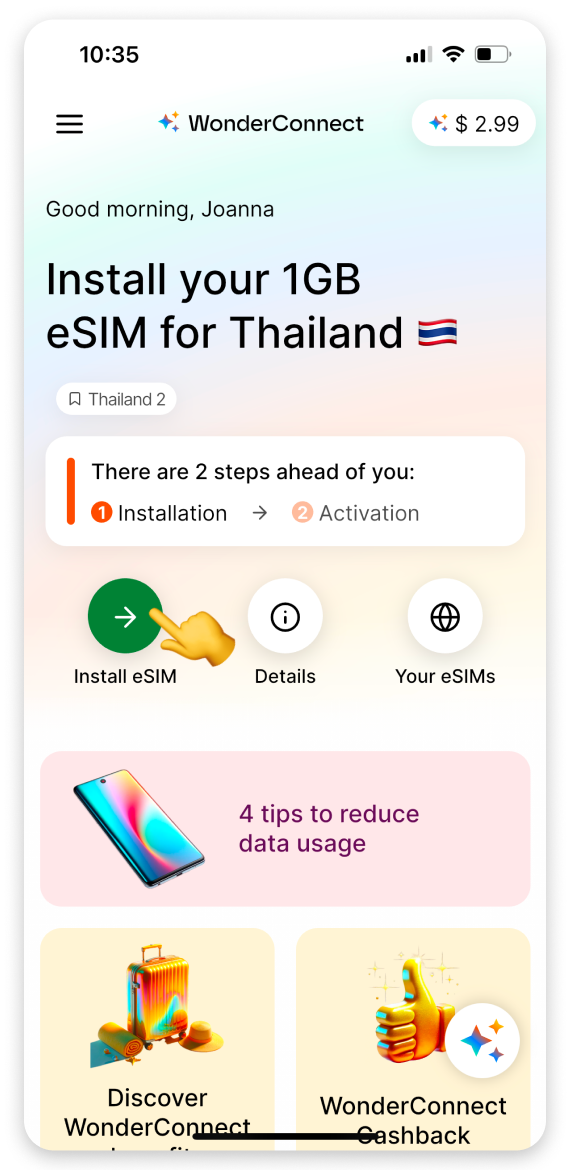
Open the WonderConnect app:
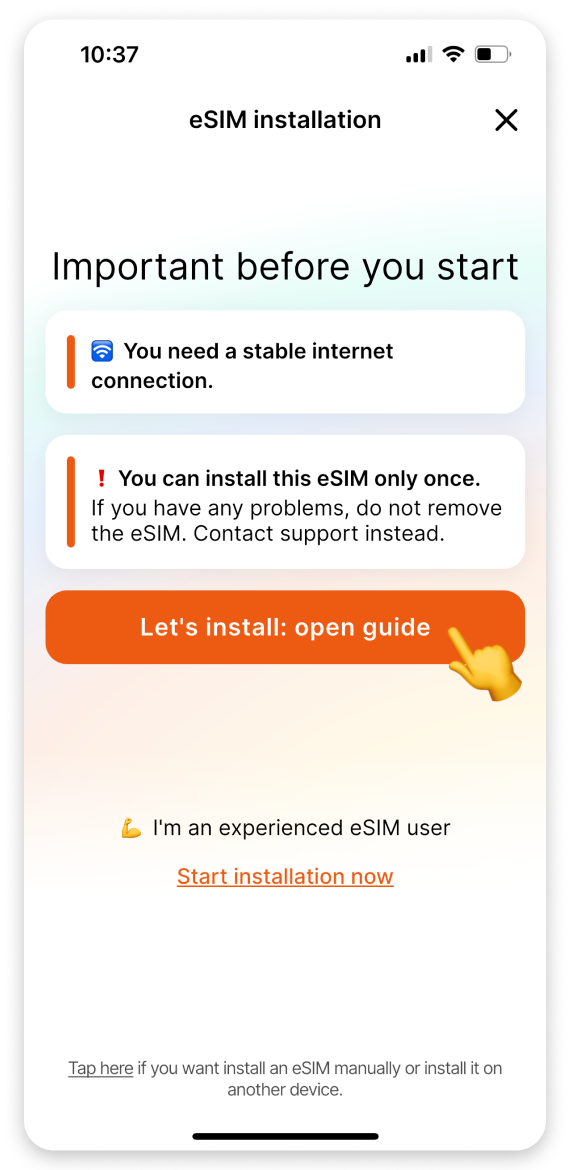
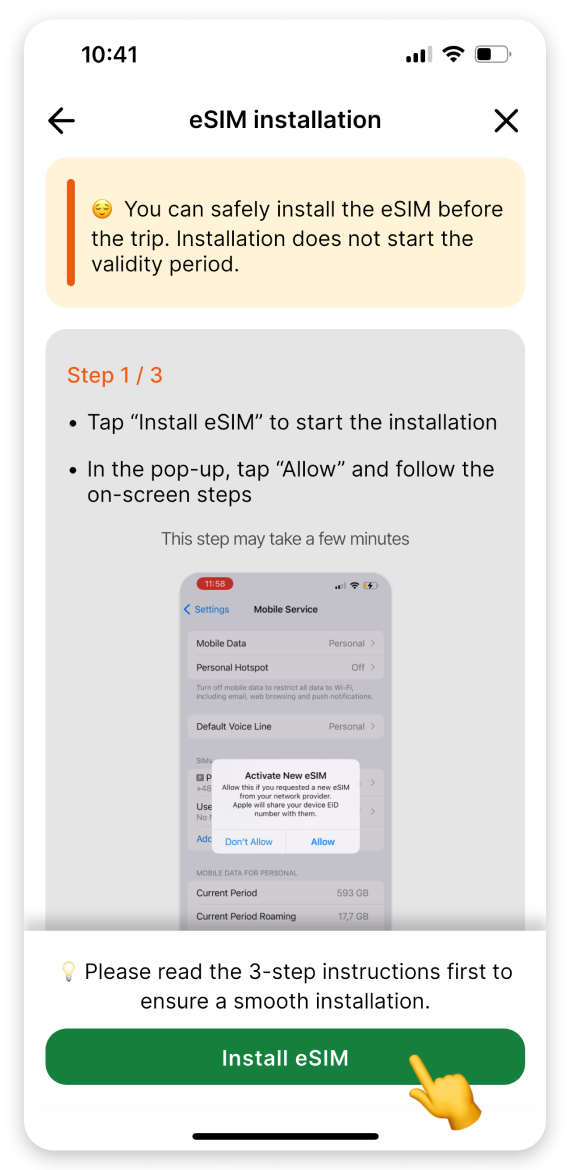
Ensure you have a stable internet connection. This is essential for a successful installation.
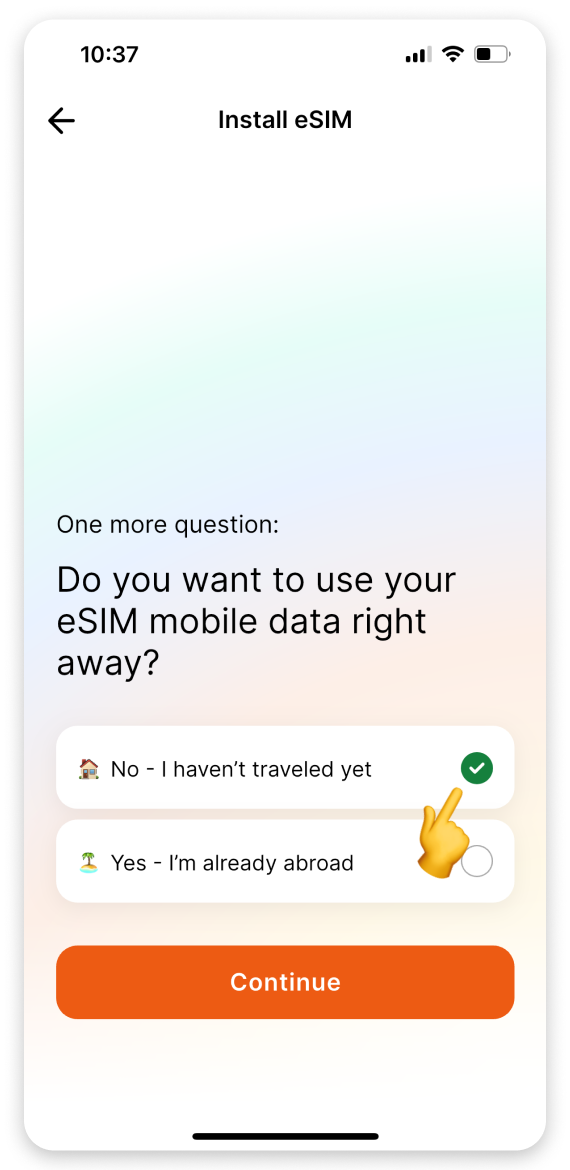
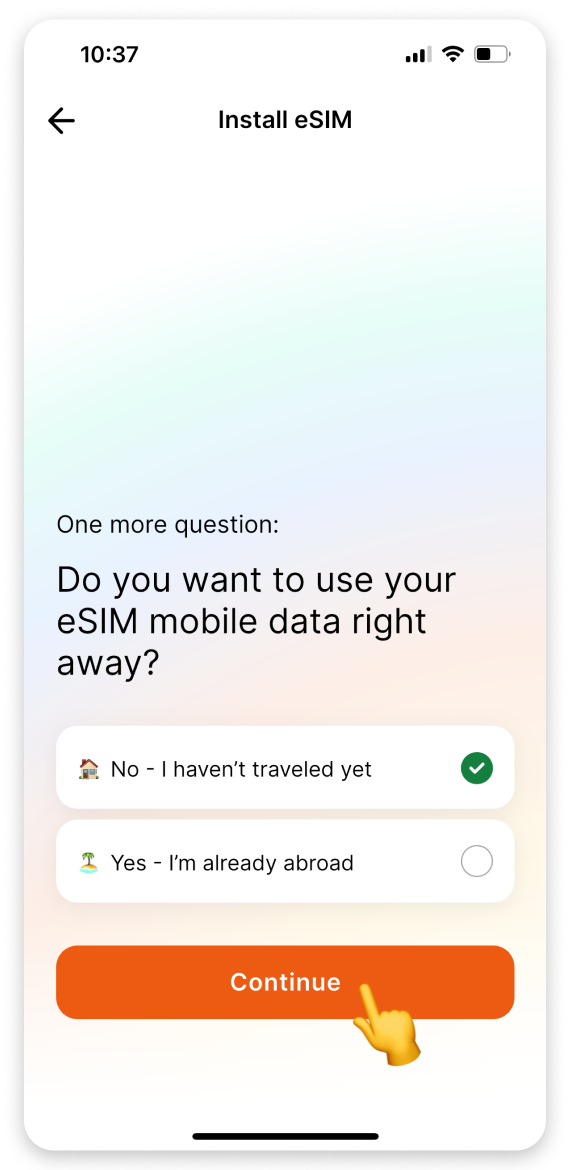
Choose when you want to start using your mobile data:
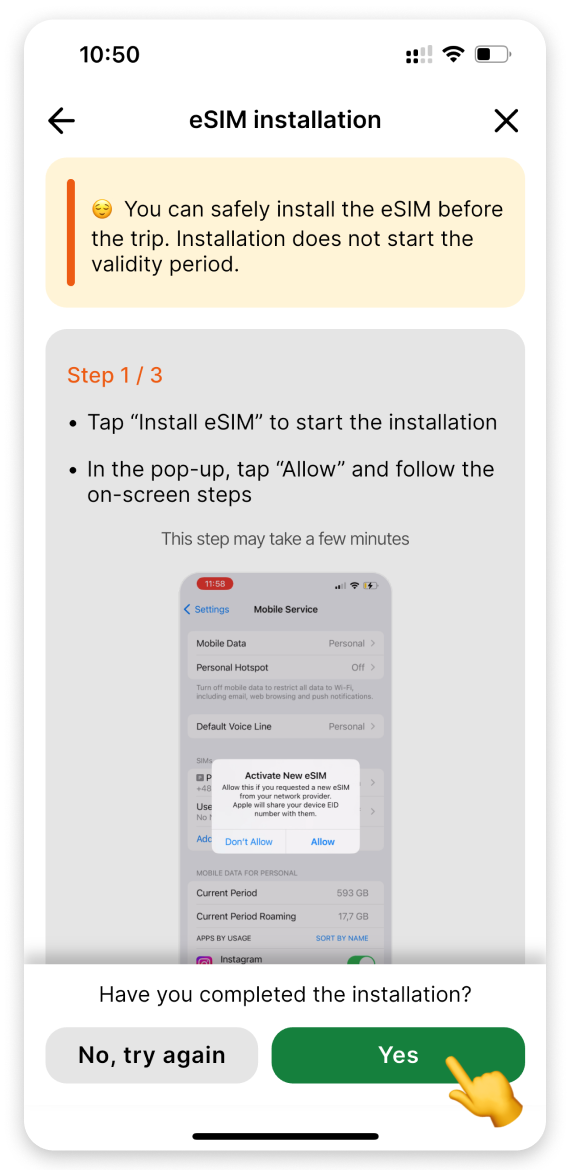
Tap Install eSIM
On the instructions view:
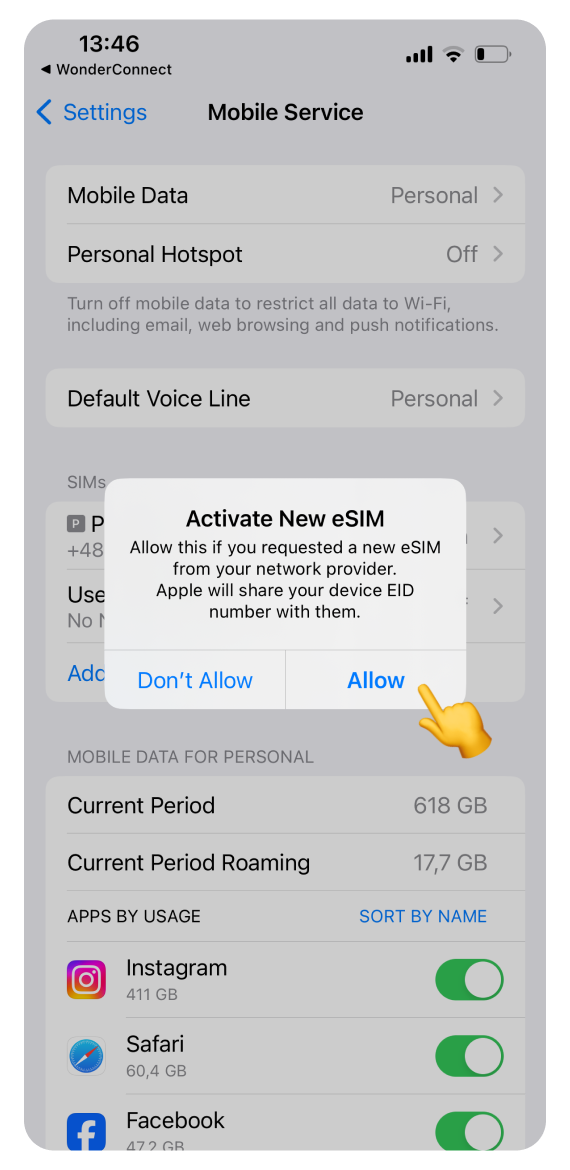
Complete the Setup Process in the Settings

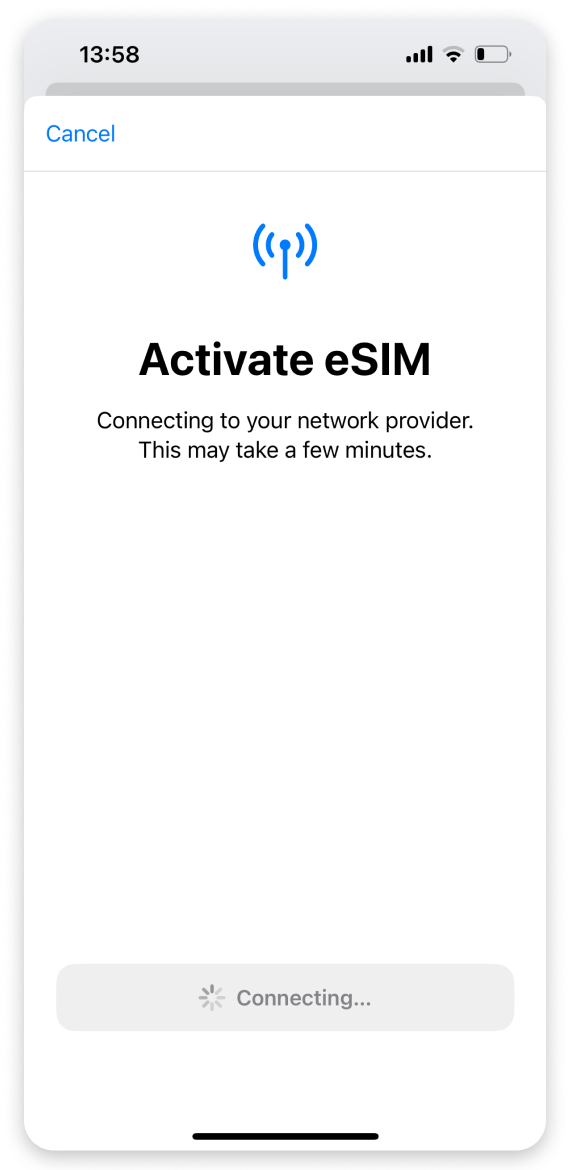
When you see the "Activating eSIM" screen with the message "You can continue using your iPhone while your eSIM is activating," you may not see the double-signal icon right away. This doesn't mean the installation failed! The eSIM status and signal icon will automatically update when you arrive at your destination and connect to the local network.
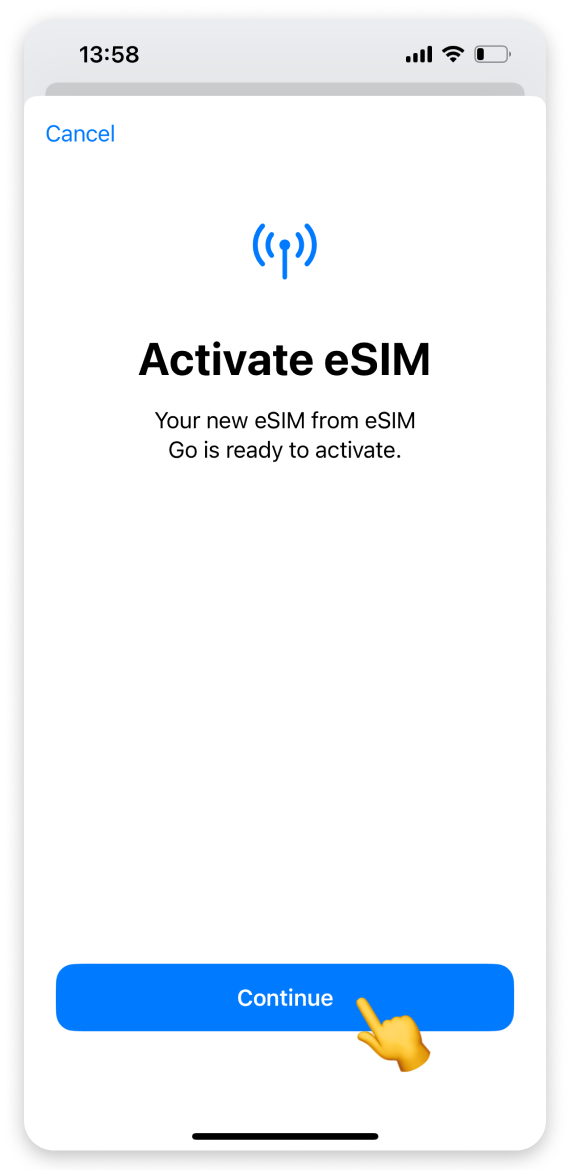
On the “Activate eSIM” screen:
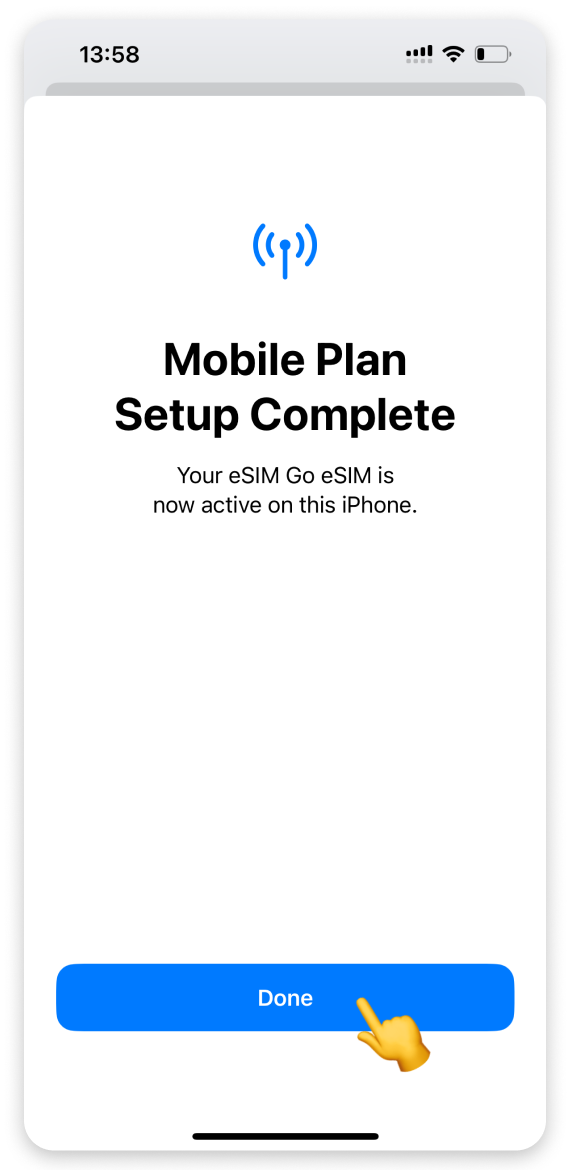
When the “Mobile Plan Setup Complete screen” appears:

You'll see "Your eSIM is now active on this iPhone." This doesn't mean your data plan is active. Activation happens only when you connect to a local network at your destination.
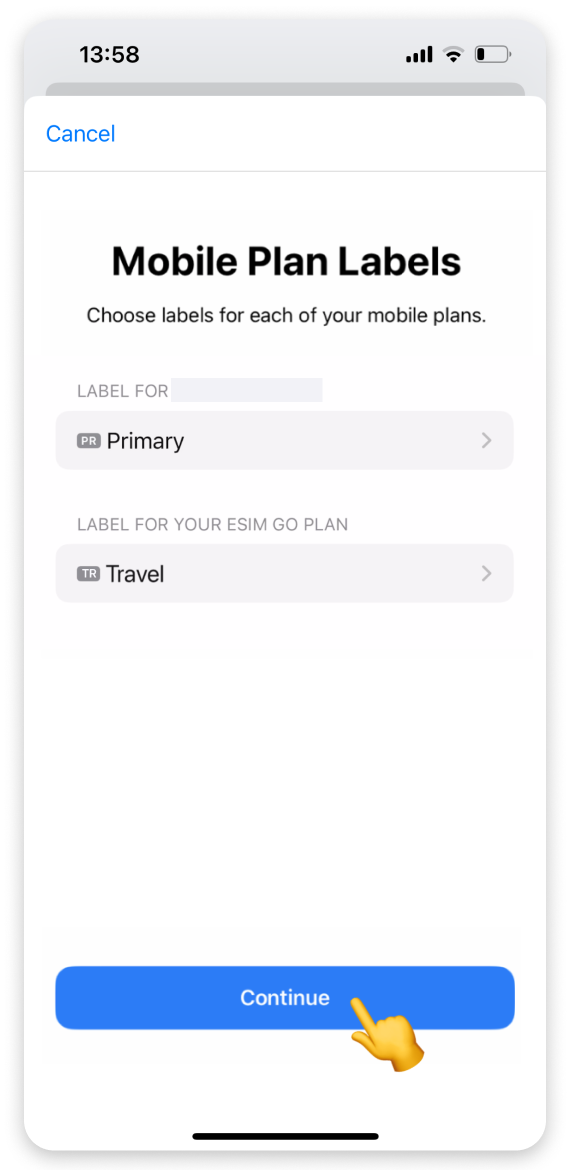
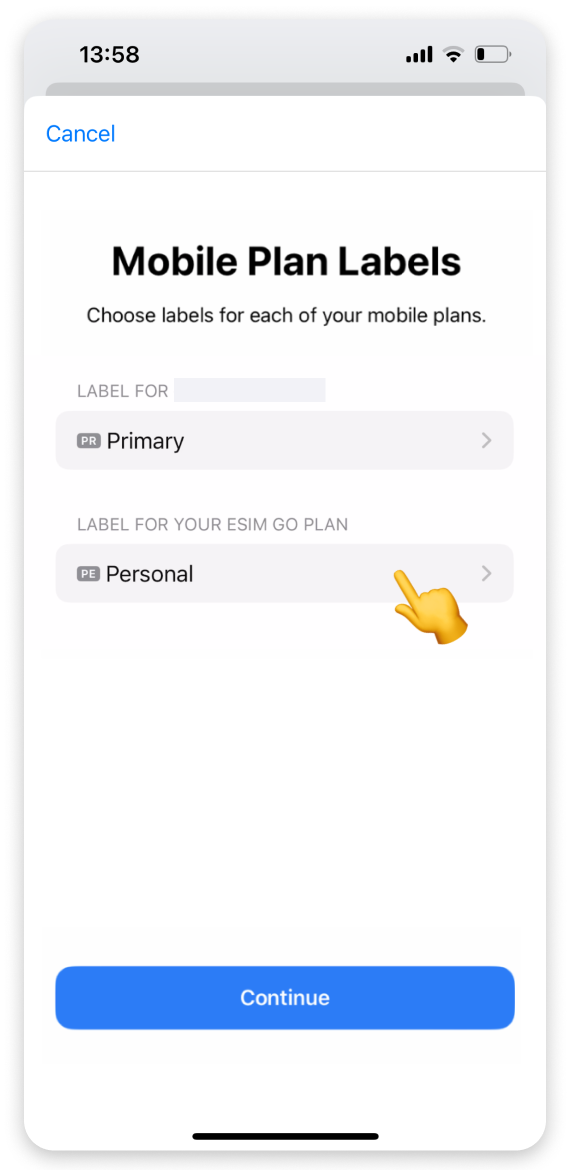
Choose a Label for Your eSIM Plan
On the “Mobile Plan Labels” screen:
You don’t see the label screen?
You can set or change your eSIM label anytime in your iPhone settings after the installation.
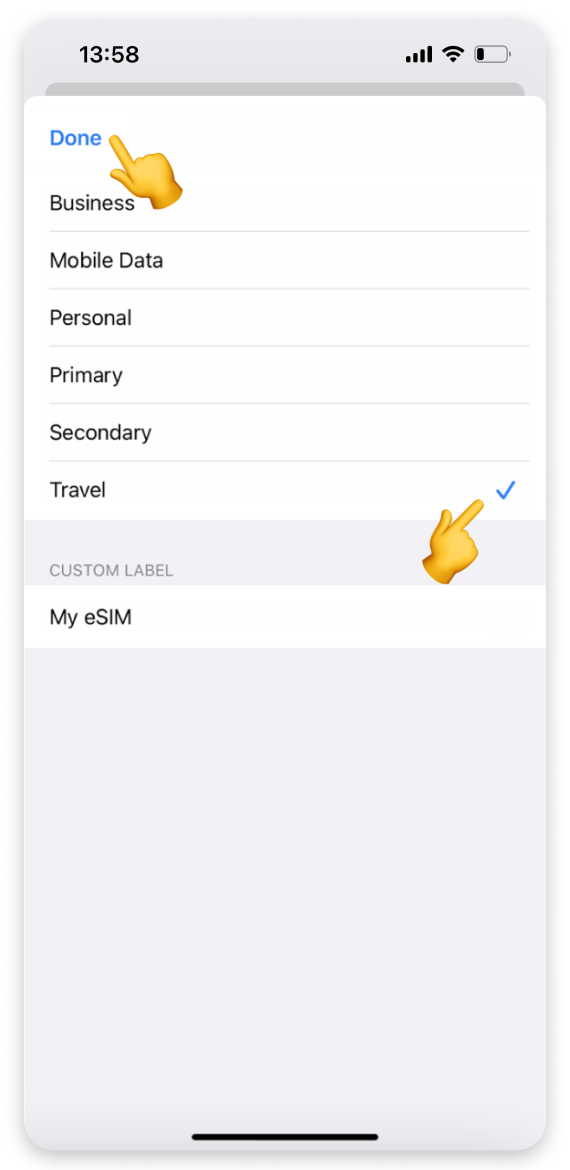
Why labeling eSIM helps
A recognizable label makes managing multiple plans in your phone settings easier. You can add the same label in the WonderConnect app.
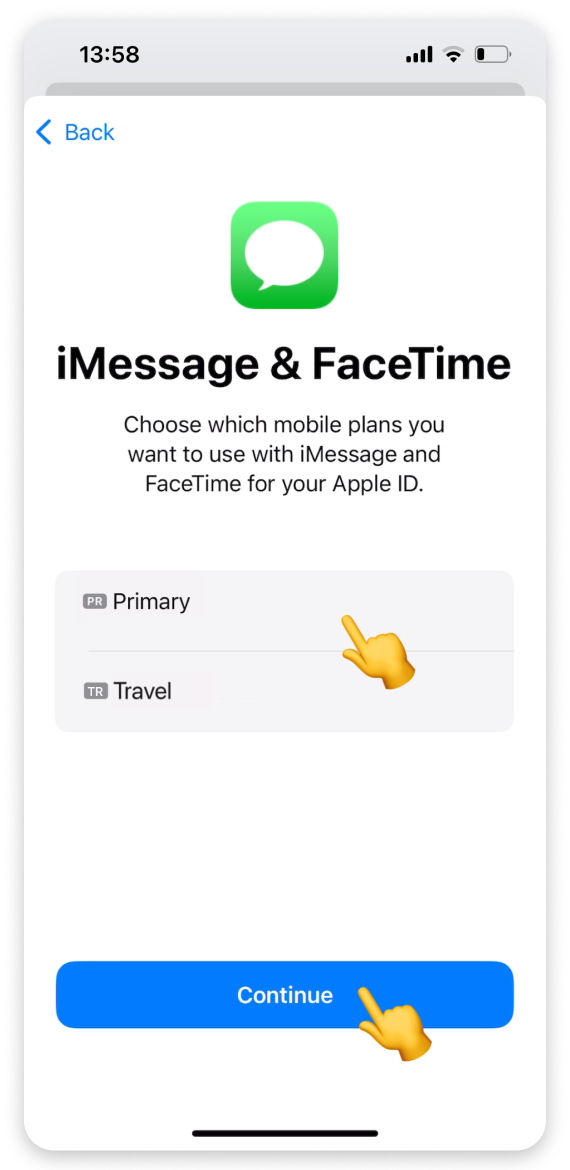
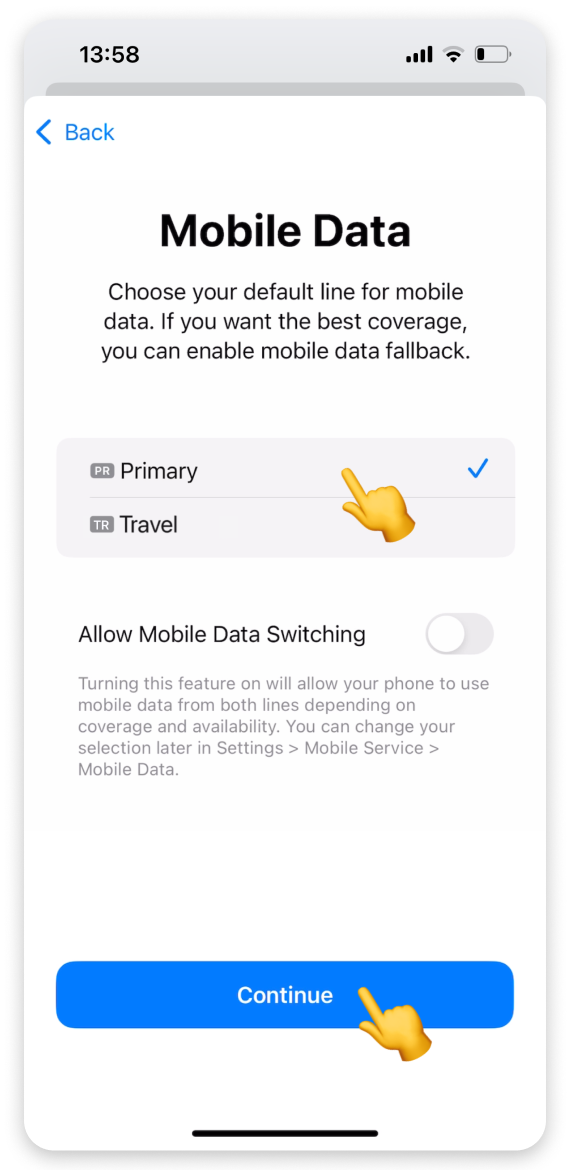
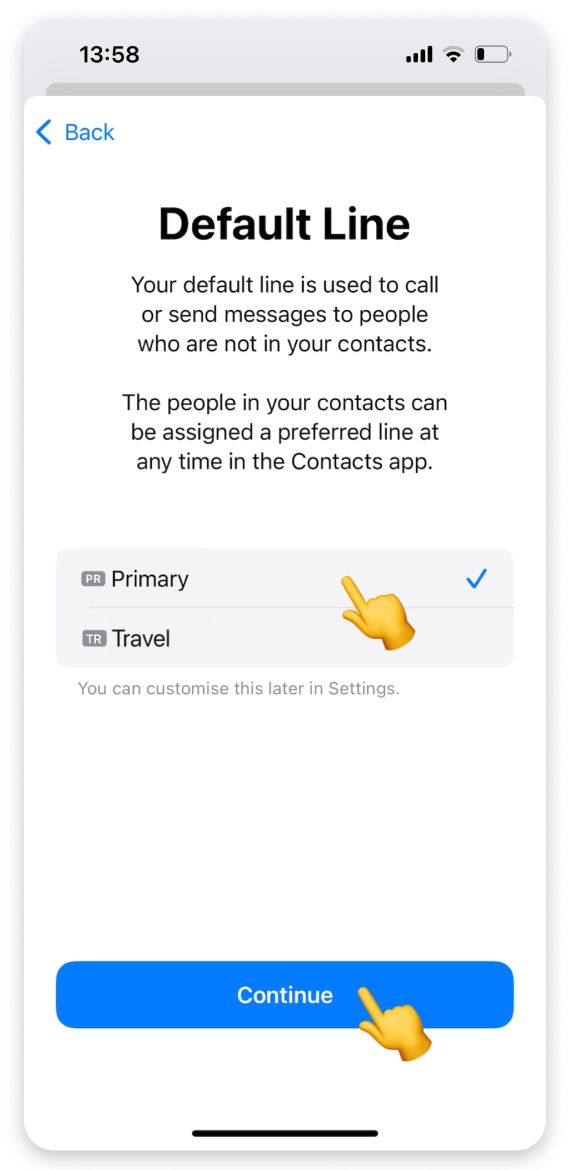
Set Your Default Lines
If you don’t see the Default Line and iMessage & FaceTime screens, it means your usual primary number is still selected for calls and iMessage. That’s the correct setup.
On the “Default Line” screen:
On the "iMessage & FaceTime" screen:
If you land in the settings and haven’t seen the line selection screens
Please check the following:
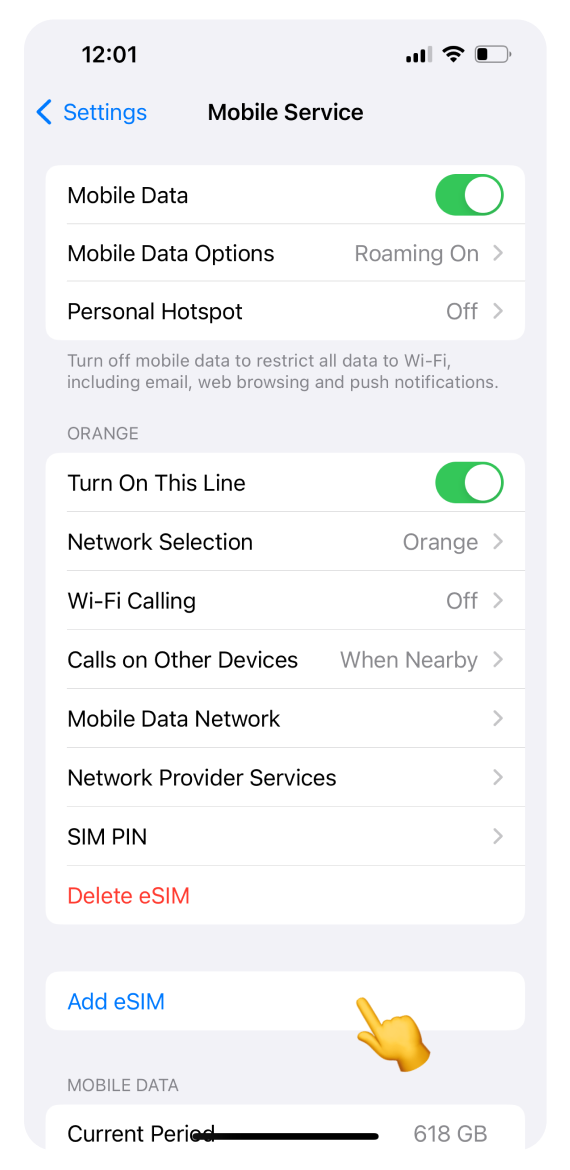
1. In the SIMs section, you should see a new eSIM labeled by your device (e.g., Mobile Data, Travel, Secondary, or something similar).
2. Make sure the new eSIM line is turned on. You should see a double signal icon at the top of your screen.
• If that’s the case, return to the WonderConnect app and tap Yes on the guide screen.
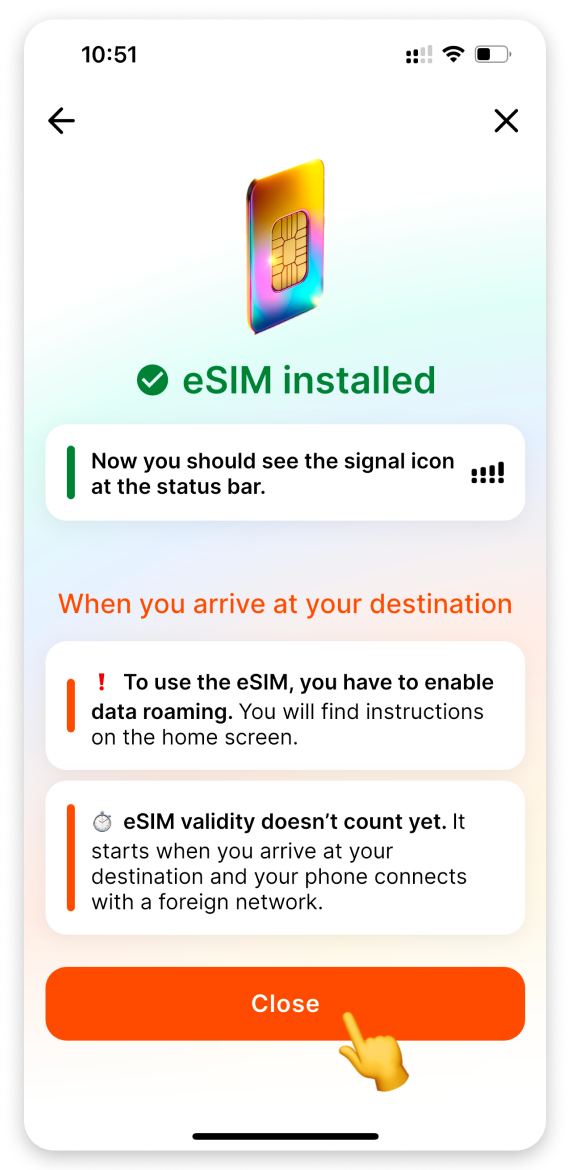
• You’ll then see the status check screen. When you see “Installed,” tap Close.
🎉 You’re all set!
Return to the app when you reach your destination, and we’ll help you activate your mobile data plan.
Set Mobile Data Preferences
Since you're installing the eSIM before your trip:
Installation Confirmation
Go back to the WonderConnect mobile app.
Tap Yes on the guide screen.
You'll see a status screen - if it shows eSIM installed, tap Close.
You’ll also receive an SMS confirming the installation.
🎉 Congratulations! Your travel eSIM is now installed and ready for activation when you reach your destination.
Installation Without the WonderConnect Mobile App or for Older iOS Versions
This method is for iPhones with iOS versions older than 17.5 or users without the WonderConnect mobile app.
Begin the Installation
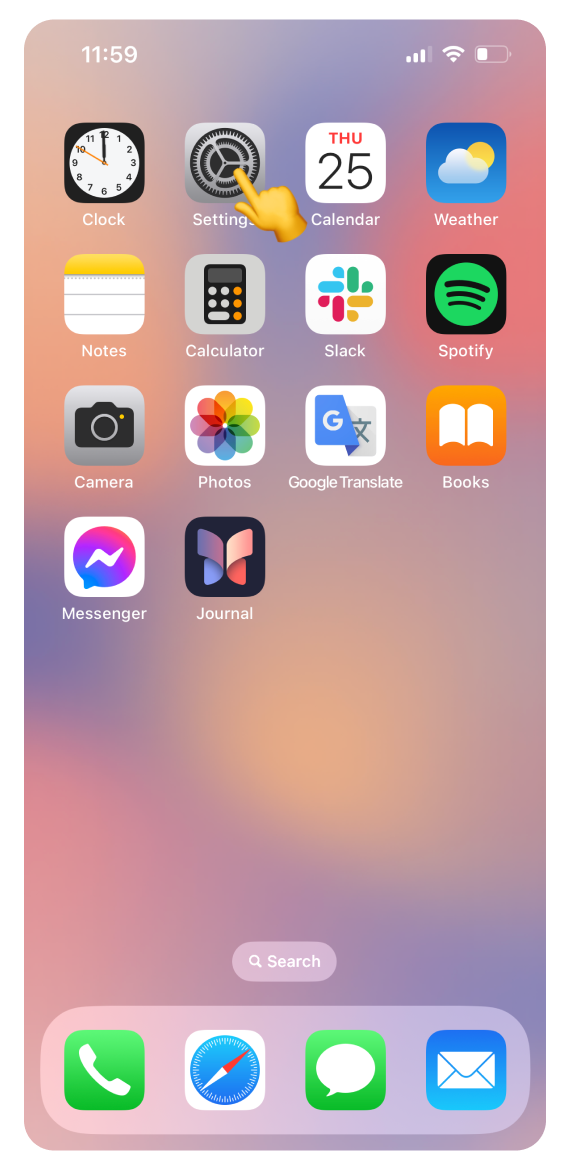
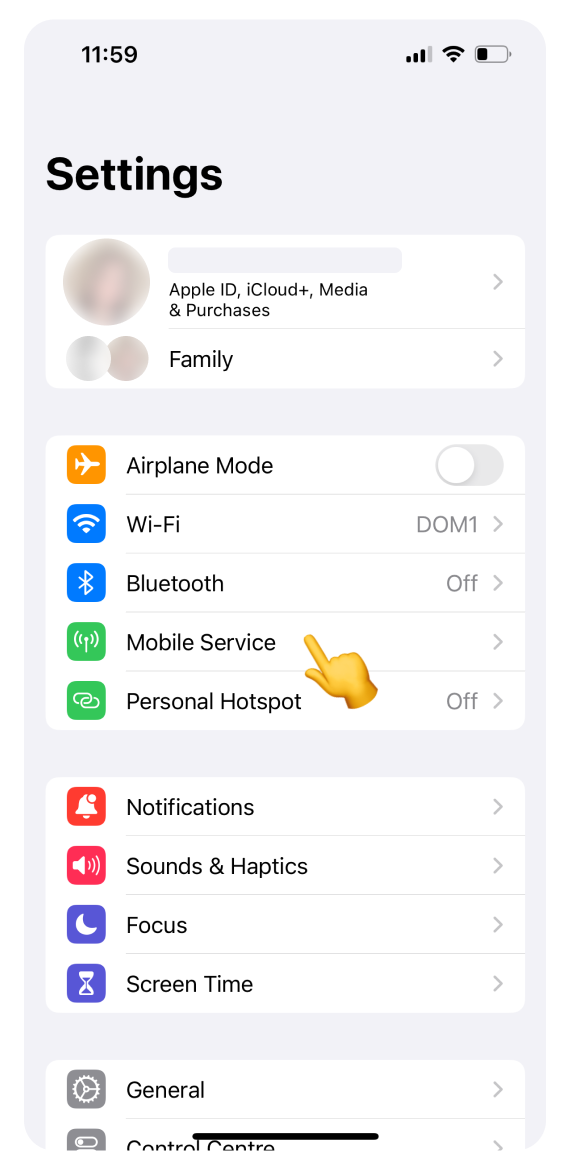
On your phone:
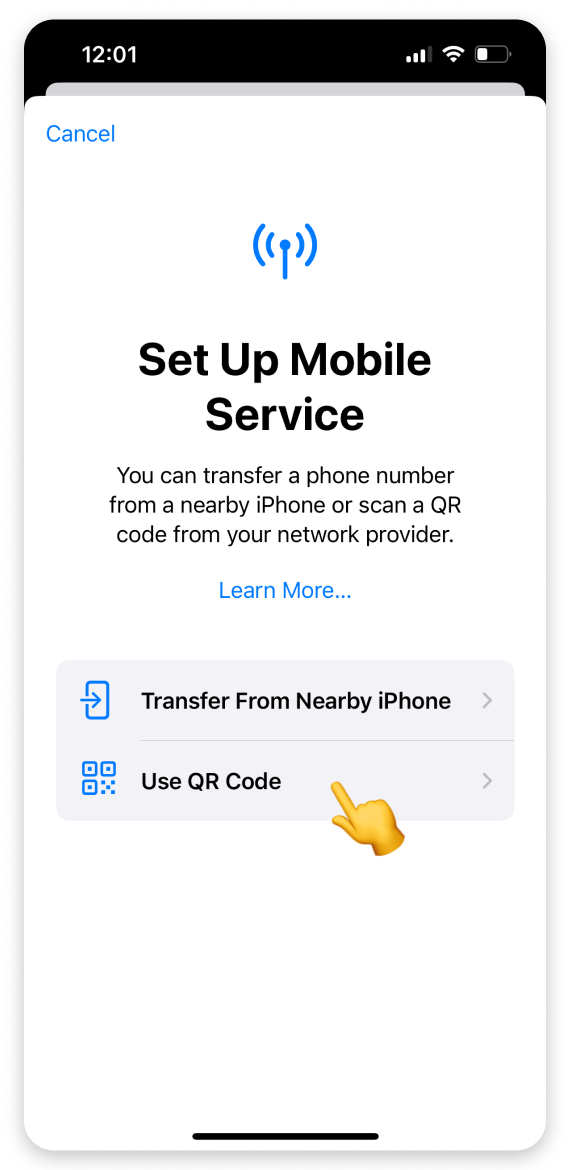
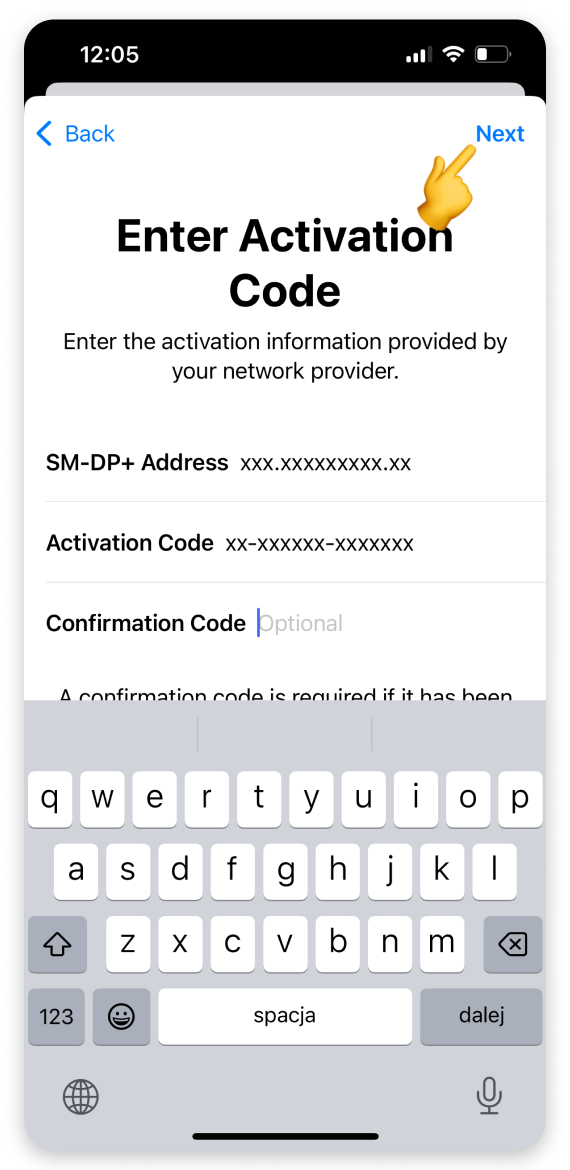
Scan the QR Code or Enter Activation Codes
Tap Use QR Code.
Where to find the QR code
💻 If you have access to your computer:
✉ Open the purchase confirmation email we sent right after you bought the eSIM. Scroll to find the QR code and scan it.
or
1. Log in to the account you used to purchase your travel eSIM.
2. Go to Your Account > click Complete eSIM setup on your eSIM view.
3. Click the “No app” tab in the pop-up and scan the QR code.
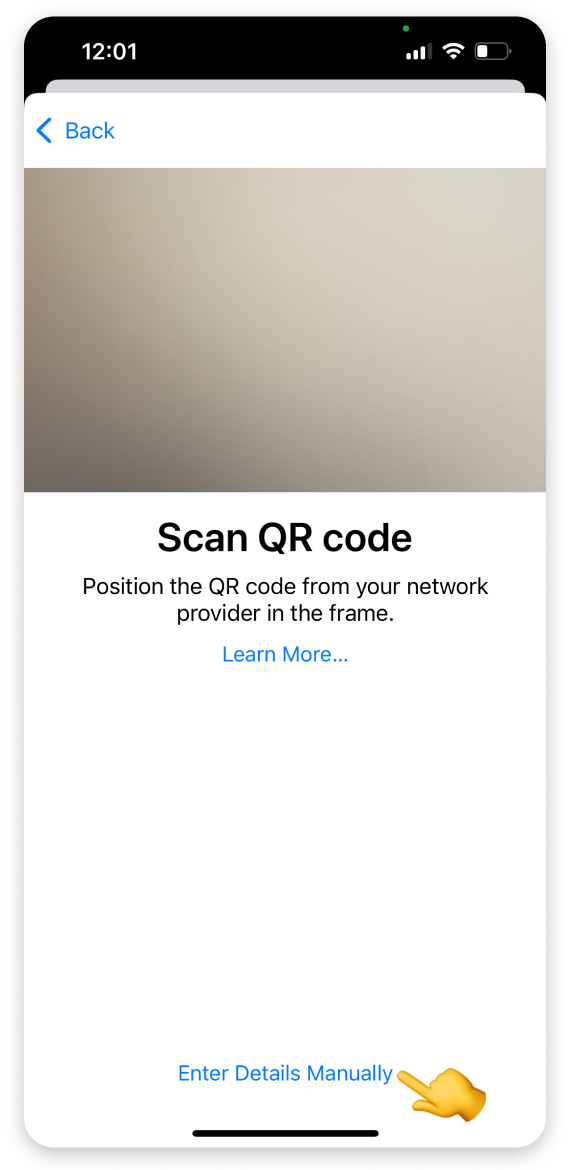
If you don’t have access to the computer:
Where to find the Activation codes
📱Using the WonderConnect mobile app:
1. Tap Details on the home screen.
2. Below the QR code, you’ll see two codes you need. Tap Copy and paste each one separately into the “Enter Activation Code” screen.
Without the mobile app:
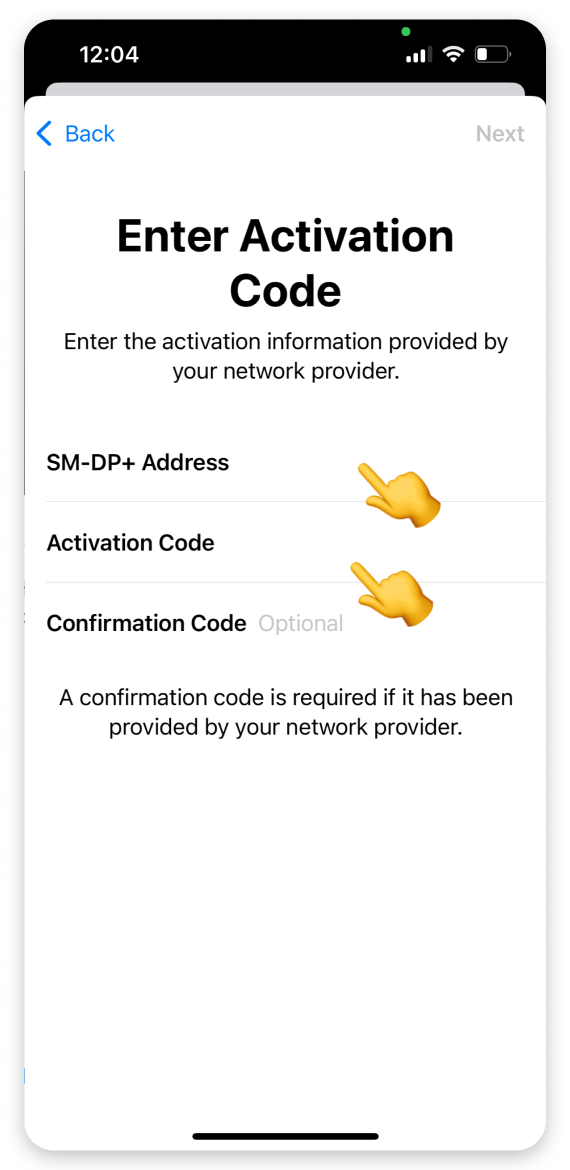
✉ Open the purchase confirmation email on your phone. Manually enter the SM-DP+ Address and Activation Code shown in the email.
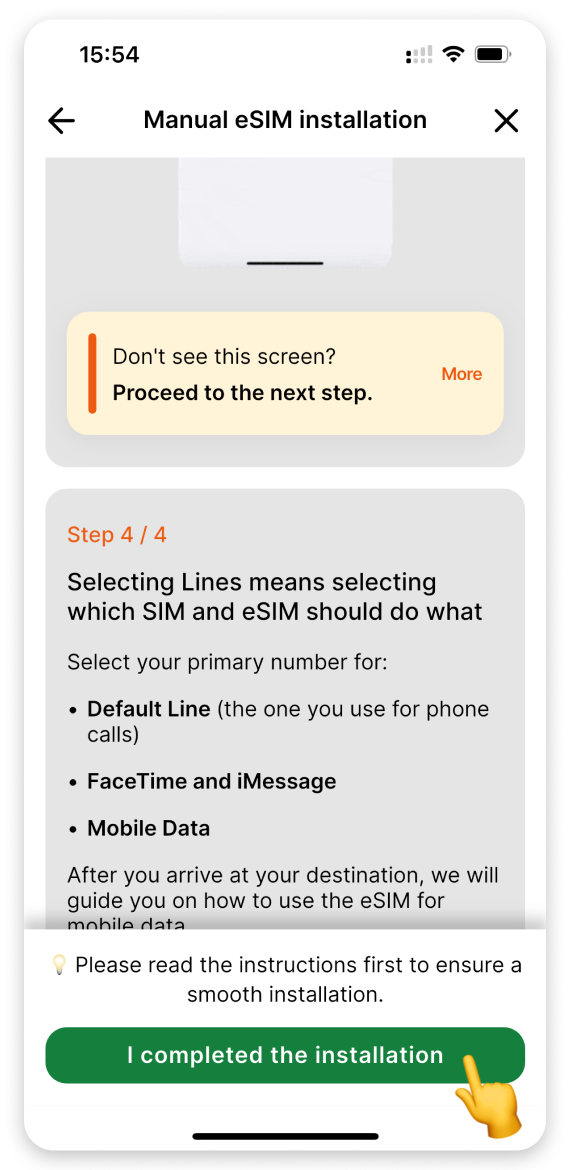
Complete the Setup Process in the Settings
When you see the "Activating eSIM" screen with the message "You can continue using your iPhone while your eSIM is activating," you may not see the double-signal icon right away. This doesn't mean the installation failed! The eSIM status and signal icon will automatically update when you arrive at your destination and connect to the local network.
On the "Activate eSIM" screen:
When the “Mobile Plan Setup Complete” screen appears:
You'll see "Your eSIM is now active on this iPhone." This doesn't mean your data plan is active. Activation happens only when you connect to a local network at your destination.
Choose a Label for Your eSIM Plan
On the “Mobile Plan Labels screen”:
You don’t see the label screen?
You can set or change your eSIM label anytime in your iPhone settings after installation
Why labeling eSIM helps
A recognizable label makes managing multiple plans in your phone settings easier. You can add the same label in the WonderConnect app.
Set Your Default Lines
If you don’t see the Default Line and iMessage & FaceTime screens, it means your usual primary number is still selected for calls and iMessage. That’s the correct setup.
On the “Default Line” screen:
On the "iMessage & FaceTime" screen:
If you land in the settings and haven’t seen the line selection screens
Please check the following:
1. In the SIMs section, you should see a new eSIM labeled by your device (e.g., Mobile Data, Travel, Secondary, or something similar).
2. Make sure the new eSIM line is turned on. You should see a double signal icon at the top of your screen.
• If that’s the case, return to the WonderConnect app and tap I completed the installation on the guide screen.
• You’ll then see the status check screen. When you see “Installed,” tap Close.
🎉 You’re all set!
Return to the app when you reach your destination, and we’ll help you activate your mobile data plan.
Set Mobile Data Preferences
Since you're installing the eSIM before your trip:
Installation Confirmation
You’ll receive an SMS confirming your installation. If you used the WonderConnect app to get the activation codes, go back to the app:
Tap I completed the installation on the guide screen.
When you see eSIM Installed on the status screen, tap Close.
🎉 Congratulations! Your travel eSIM is now installed and ready for activation when you reach your destination.
Next Step: Activate Mobile Data at Your Destination
Your eSIM is installed, but it’s not active yet. Here's what is ahead of you:
Wait until you arrive at your destination.
When you get there, turn on data roaming to start using your eSIM. Need help? Check the Activate eSIM mobile data on iPhone article for step-by-step instructions.